95PGTTech 1/10 2WD ECX Ruckus build

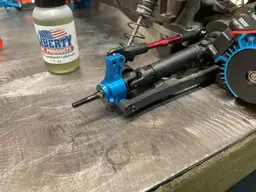
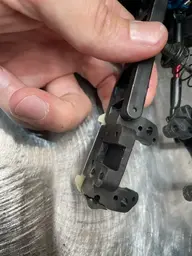
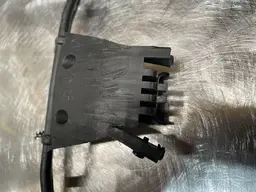
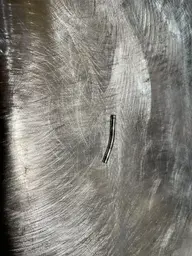
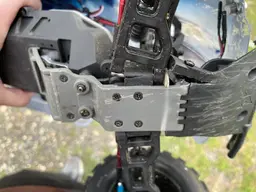
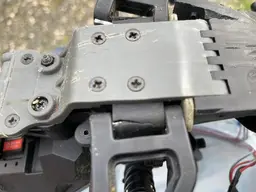
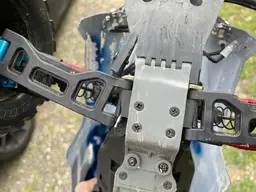
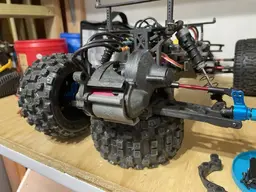
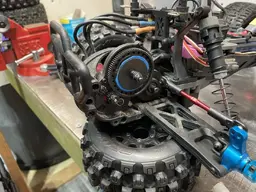
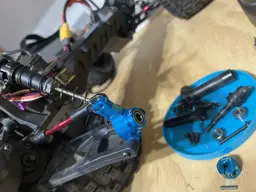
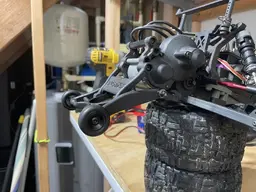
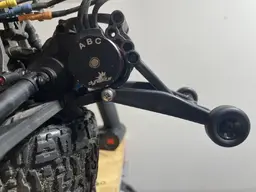
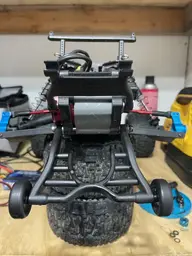
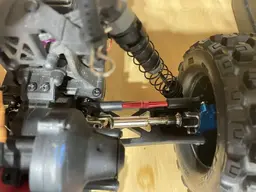
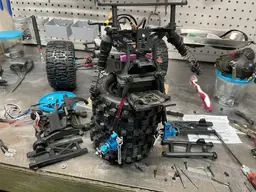
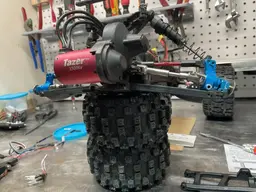
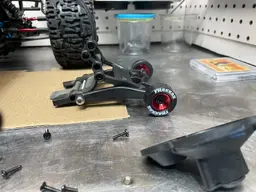
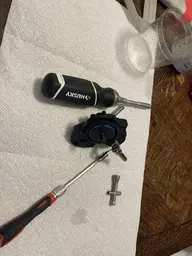
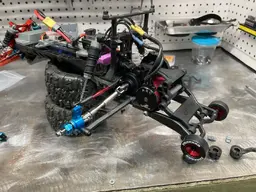
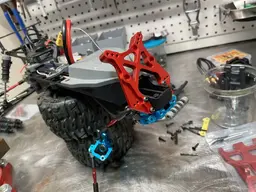
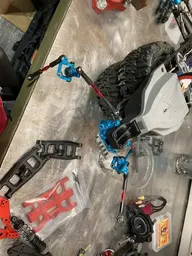
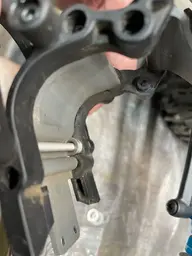
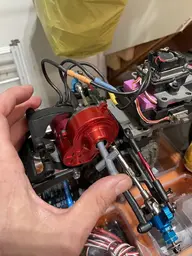
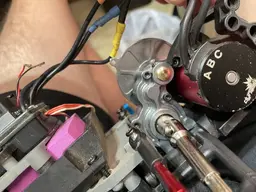
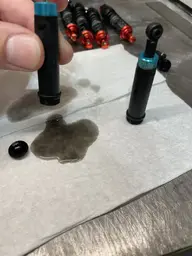
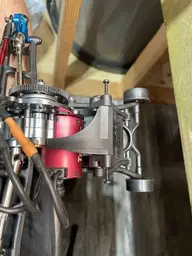
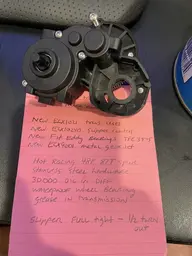
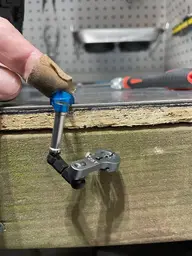
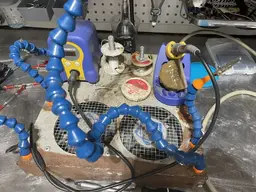
bent ANOTHER hot racing bellcrank arm, same spot. zero help from HR again. straightened it out, removed the anodizing chemically/mechanically, and sent it off to have my friend TIG weld it.

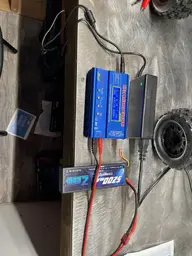
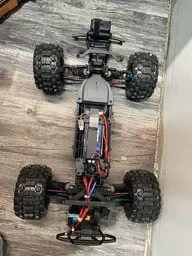
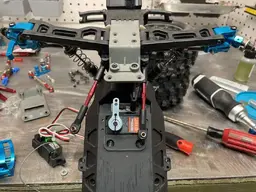
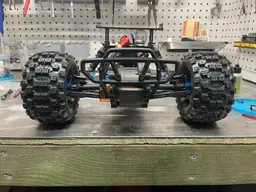
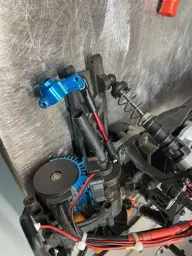
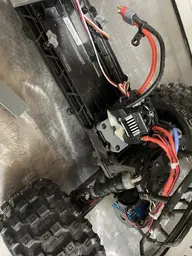
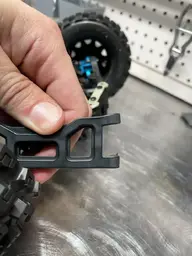
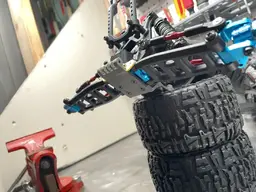
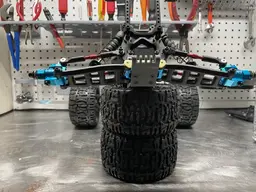
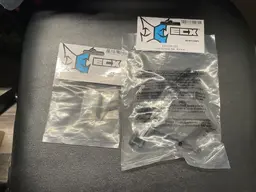
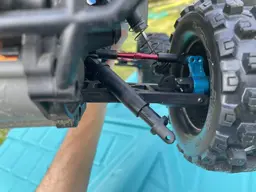
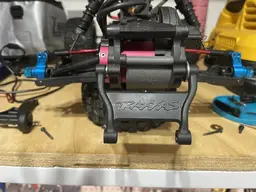
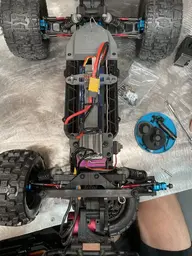
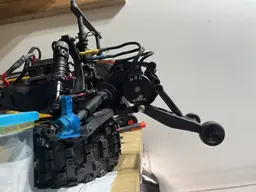
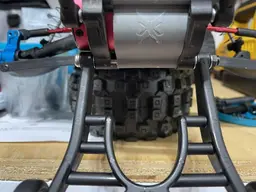
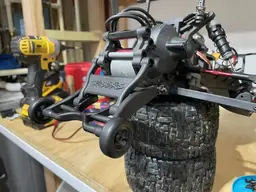
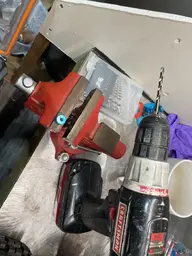
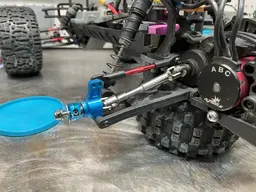
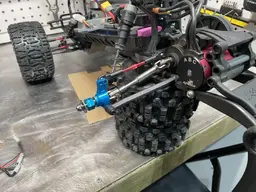
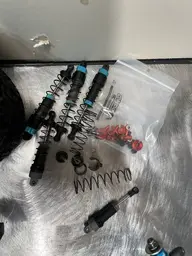
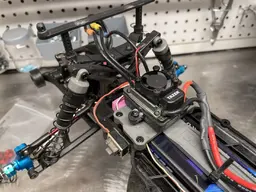
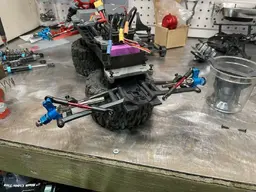
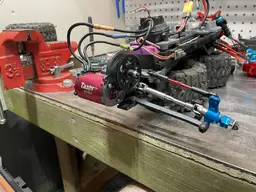
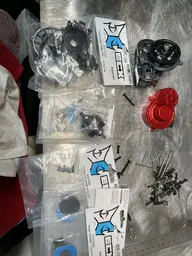
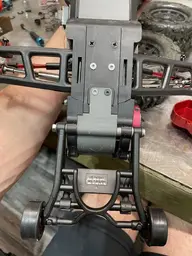
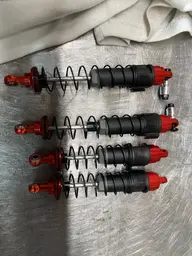
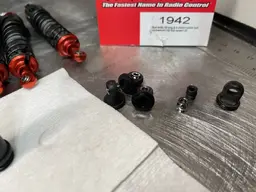
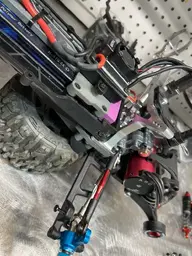
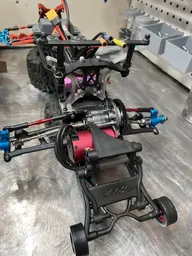
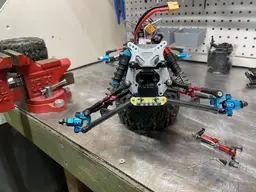
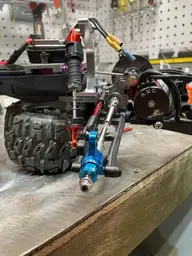
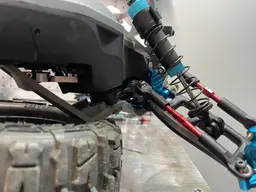
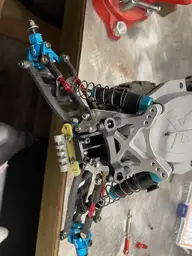
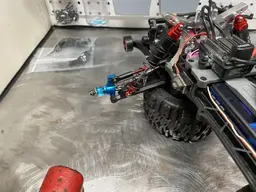
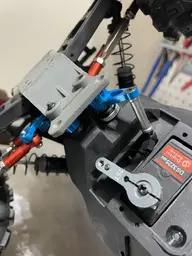
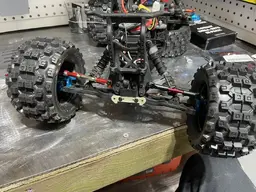
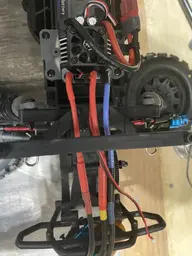
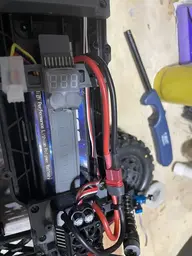
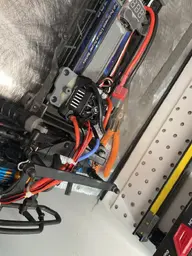
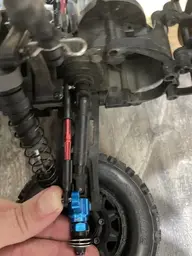
Went to traxxas arms PN 3741x, the ends are now not all metal and the rods are much beefier. I got a set of RPM rod ends for them too. Much less play as people advised. Ordered 2 kits covered all 6 arms and left me some extra. Finally shortened some wires and soldered on new connectors. went to the large (thick) aluminum hubs front and rear
 

Attachments

  • 98F153E5-56CD-49C7-A04A-792ACFBCC548.jpeg
    98F153E5-56CD-49C7-A04A-792ACFBCC548.jpeg
    188.4 KB · Views: 6
  • F63FC48E-0932-4950-AB52-528056D9A4FC.jpeg
    F63FC48E-0932-4950-AB52-528056D9A4FC.jpeg
    131.3 KB · Views: 6
  • FCDE40A1-2CA5-4619-8907-EF8A3A5BADFA.jpeg
    FCDE40A1-2CA5-4619-8907-EF8A3A5BADFA.jpeg
    225 KB · Views: 7
  • E53F3B06-C391-4B6F-8FBF-84E49682660D.jpeg
    E53F3B06-C391-4B6F-8FBF-84E49682660D.jpeg
    295.5 KB · Views: 6
  • 4404804E-1C67-4882-945A-210622164DC2.jpeg
    4404804E-1C67-4882-945A-210622164DC2.jpeg
    283.6 KB · Views: 6
  • E659B6BE-88FD-4BA6-9DA3-8182F92F11DC.jpeg
    E659B6BE-88FD-4BA6-9DA3-8182F92F11DC.jpeg
    193.4 KB · Views: 6
  • 7598B4F7-EE65-47D7-938C-68C8C65166E5.jpeg
    7598B4F7-EE65-47D7-938C-68C8C65166E5.jpeg
    120.1 KB · Views: 6
  • D90F2F55-1F0A-4FAF-9E09-6DA27F7EA145.jpeg
    D90F2F55-1F0A-4FAF-9E09-6DA27F7EA145.jpeg
    135.5 KB · Views: 5
  • 02E14FA4-BC4C-426B-B64D-964740A4D8F9.jpeg
    02E14FA4-BC4C-426B-B64D-964740A4D8F9.jpeg
    168.5 KB · Views: 5
  • 7364F452-A725-444C-8A5E-A4A7625021E4.jpeg
    7364F452-A725-444C-8A5E-A4A7625021E4.jpeg
    118.7 KB · Views: 5
Last edited:
Ended up replacing all the wheel bearings with those sealed metal ones. At least one FastEddy bearing in each hub was bad already grinding as it went around. We will see how these hold up. Finally found a 16mm washer to get as big as the wheels would allow. Still had to drill out the center to 4mm to make it work, but now there is so little play in the wheels with all the upgrades compared to stock.

Put RPM bellcrank in it for now while waiting on my arm to get mailed back. We did a new best 47mph considering the grass is that high we are pretty happy with it. It's certainly faster than the dogs now.

Chasing down an issue. The new 2S 100C batteries (both) have a really short run time. Like two minutes. Some of it I'm sure is running the lights and the drag brake, but I took a look at the alarm and it's showing like a .5V difference between the two cells. I have one of those balance chargers that charges it through the balance port, they don't sit for a long time, I charged them right out of the box before using. So I got a "real" charger and we have been trying to discharge and recharge at a very slow rate to get them to balance like the youtube videos. I think we are .3V apart now. I think part of the runtime issue is the ESC sees the lower cell which is probably only starting at 3.75 or so to start and hitting the LVC. We also got a 21tooth pinion to try.
 

Attachments

  • 498C5DF0-9059-4B4D-8C97-13D79B95D8EA.jpeg
    498C5DF0-9059-4B4D-8C97-13D79B95D8EA.jpeg
    171.3 KB · Views: 4
  • 98E9FFAD-E879-4DAC-9E54-44EBBBC546FA.jpeg
    98E9FFAD-E879-4DAC-9E54-44EBBBC546FA.jpeg
    128.1 KB · Views: 5
  • E0A96D0D-9659-47C2-A74B-0F899D9556AD.jpeg
    E0A96D0D-9659-47C2-A74B-0F899D9556AD.jpeg
    422.2 KB · Views: 5
  • 9969276E-7E43-43F5-A011-E065C34A6B55.jpeg
    9969276E-7E43-43F5-A011-E065C34A6B55.jpeg
    274.3 KB · Views: 4
  • EF445AEB-A655-43F7-862E-60685AADA443.jpeg
    EF445AEB-A655-43F7-862E-60685AADA443.jpeg
    252.3 KB · Views: 4
  • E68C9C5A-C28A-4915-AAEE-A32F1230FCAD.jpeg
    E68C9C5A-C28A-4915-AAEE-A32F1230FCAD.jpeg
    226.1 KB · Views: 4
  • 2821B952-0816-46A9-BDBB-12DFD222AA26.jpeg
    2821B952-0816-46A9-BDBB-12DFD222AA26.jpeg
    132.7 KB · Views: 4
  • 760C8107-6AA8-45FB-B8DA-258E46DB3FED.jpeg
    760C8107-6AA8-45FB-B8DA-258E46DB3FED.jpeg
    261.3 KB · Views: 4
  • F3A9D941-537A-499B-A712-FFF674175DA1.jpeg
    F3A9D941-537A-499B-A712-FFF674175DA1.jpeg
    247.4 KB · Views: 4
  • 027F3455-A87C-4A71-80C6-5F7866D2564F.jpeg
    027F3455-A87C-4A71-80C6-5F7866D2564F.jpeg
    188.2 KB · Views: 3
Last edited:
It is a MONSTER on 3s. I can’t imagine this thing once it’s dialed in on the big motor and geared. Probably lost 5kph easily due to grass/terrain and wet

Overall it’s actually slower than 2S. 40kph give or take on average runs because it power wheelies even rolling into the throttle and softened through ESC and controller settings. If you let out and let the front end come back down and roll back into it, it goes right back up. If you aren’t completely straight on the hit, it wheelies and tumbles sometimes pretty violently.
 

Attachments

  • AE9C4A79-8BD8-436E-B6D3-DEA135CF7412.png
    AE9C4A79-8BD8-436E-B6D3-DEA135CF7412.png
    96.1 KB · Views: 2
  • 6F35F30D-FE0A-4218-8831-E6E3621CC1E1.jpeg
    6F35F30D-FE0A-4218-8831-E6E3621CC1E1.jpeg
    380.5 KB · Views: 2
Well, the inevitable happened. 3 year old with a 50mph capable missile eventually outran his talent. Speed brakes weren’t speedy enough and took it into a metal guard rail at GPS says 40kph.

Chassis is fine. I actually have that lower block from another package I ordered for wheel hexes but I need to order bumper LCAs and pins. The GPS was mounted to the front bumper and hit the 3d printed case directly. I messaged the seller on eBay and ordered another, the GPS doesn’t have a scratch on it.
 

Attachments

  • 7DAB23BF-BAF4-4334-BDD5-7DC4268CFE59.jpeg
    7DAB23BF-BAF4-4334-BDD5-7DC4268CFE59.jpeg
    183.8 KB · Views: 6
  • 79FCD93A-4E87-450D-B33C-254CBCD0560C.jpeg
    79FCD93A-4E87-450D-B33C-254CBCD0560C.jpeg
    131.7 KB · Views: 6
  • B69B3831-704B-4B76-8D1F-5516434D1DEA.jpeg
    B69B3831-704B-4B76-8D1F-5516434D1DEA.jpeg
    231.6 KB · Views: 6
  • 19302E17-9DAC-4887-BF9C-769A93B48F80.jpeg
    19302E17-9DAC-4887-BF9C-769A93B48F80.jpeg
    112.6 KB · Views: 6
  • CA571D19-284D-4FD4-9979-B960FDF8A94C.jpeg
    CA571D19-284D-4FD4-9979-B960FDF8A94C.jpeg
    246.2 KB · Views: 6
  • 2A1ED08A-D230-4776-8610-801CAA2F239A.jpeg
    2A1ED08A-D230-4776-8610-801CAA2F239A.jpeg
    77.6 KB · Views: 6
  • 8A5759E3-A816-4AC1-AE8E-113825C8A8D5.jpeg
    8A5759E3-A816-4AC1-AE8E-113825C8A8D5.jpeg
    238 KB · Views: 6
  • 79A3837B-E7AA-494A-943F-9B6A0B42BAAF.jpeg
    79A3837B-E7AA-494A-943F-9B6A0B42BAAF.jpeg
    168 KB · Views: 6
  • B37BC4BF-997E-4841-84F0-05ED7545673C.jpeg
    B37BC4BF-997E-4841-84F0-05ED7545673C.jpeg
    156.2 KB · Views: 6
  • EAACF51A-587A-4286-816E-7CF34CE80D7B.jpeg
    EAACF51A-587A-4286-816E-7CF34CE80D7B.jpeg
    209.9 KB · Views: 6
Hot Racing lower suspension mount arrived. Got it and the RPM arms installed. Waiting on hinge pins and front bumper to arrive from Horizon Hobby. It’s all back together otherwise, and put the crappy stock tires back on. I’d rather be spinning them than wheelie/tumble machine. Got spares?

Here’s our 4WD thread
https://www.ecxforum.com/threads/1-10-4wd-build.3326/

As disappointed as I am in how I underestimated the lack of aftermarket/replacement parts for it so bad (and my complete hatred for Hot Racing), we did learn that for sure we should be in a 4wd monster truck chassis for what we do with RCs
 

Attachments

  • 07897226-F5B9-4366-835B-5346453E3C83.jpeg
    07897226-F5B9-4366-835B-5346453E3C83.jpeg
    187.2 KB · Views: 4
  • FBC3D07F-4776-45B7-A131-72096A0FA364.jpeg
    FBC3D07F-4776-45B7-A131-72096A0FA364.jpeg
    175.5 KB · Views: 38
  • 14DCA6C6-41D0-48C1-84A2-22D53749A125.jpeg
    14DCA6C6-41D0-48C1-84A2-22D53749A125.jpeg
    220.5 KB · Views: 38
Pin set and new front bumper installed. Back to running just fine. Figured out the best combo is the 2s battery with the stock tires on the front and the badlands on the back. With all 4 stock tires it’s just a donut machine and not fun to drive. With all 4 prolines it grip rolls every turn. Even now it power wheelies but it’s liveable. On 3s it can’t apply any of the power, ever.

If we hadnt moved to the 4wd, we could probably do some more with this - shocks, aluminum shock towers, wheelie bar, front weights, play with alignment. We will probably just keep it as a backup toy for the days we are servicing the other truck. Eventually I’ll move the esc and motor out of this one and put the 10BL120 and goolrc 4300kv into it and sell it. It really isn’t even useful as a parts truck, the 2wd and 4wd are nearly completely different in all parts.
 

Attachments

  • C20B8FFA-6DFE-4B35-9909-2913F73737FB.jpeg
    C20B8FFA-6DFE-4B35-9909-2913F73737FB.jpeg
    262.8 KB · Views: 2
  • 3308D41D-70B9-4534-821F-7BE0FCF43310.jpeg
    3308D41D-70B9-4534-821F-7BE0FCF43310.jpeg
    321.2 KB · Views: 2
Honestly, I’m surprised it took this long to break a stock axle. We are still on stock internal trans gears too
 

Attachments

  • 76C196D5-69EB-4149-8470-68C71B93B9C1.jpeg
    76C196D5-69EB-4149-8470-68C71B93B9C1.jpeg
    328.7 KB · Views: 2
  • 06BEE7FF-FDC5-4D9D-9622-2DC274C6F3F5.jpeg
    06BEE7FF-FDC5-4D9D-9622-2DC274C6F3F5.jpeg
    339.7 KB · Views: 2
  • 7DC54131-DAD5-4D30-B1E5-44C1A8E61953.jpeg
    7DC54131-DAD5-4D30-B1E5-44C1A8E61953.jpeg
    138.7 KB · Views: 2
Did some disassembling, measuring, and test fitting to mount the Traxxas wheelie bar. Detailed How To thread here:

https://www.ecxforum.com/threads/how-to-2wd-wheelie-bar.3333/

Installed the Tazer ESC and 3300kV motor (stock stuff from the brushless 4x4) as we begin to get this one final sorted out and prepared to sell. Got all the wires soldered and organized, going to keep this on 2S 50C batteries I have sitting around. Zero point in giving this thing a bunch of power it can't put to the ground. Doing a wheelie and donuts is fun for all of about 5 minutes but really takes the fun out of driving when it does NOTHING BUT wheelies and donuts. Especially when your driver is 3. Current gearing is 48P 21/87. Motor stays ~ 170F measured infared. I'm sure it would be even cooler if our terrain wasn't predominantly tall grass. Replaced the right rear wheel bearings again. Can't really figure out what happened, possibly a casualty of the axle going south.
 

Attachments

  • AEF36552-1592-49EA-9077-58EB502A85B5.jpeg
    AEF36552-1592-49EA-9077-58EB502A85B5.jpeg
    171.2 KB · Views: 5
  • 151A461E-B6B4-4CAB-812D-2FC51DD63C5D.jpeg
    151A461E-B6B4-4CAB-812D-2FC51DD63C5D.jpeg
    177.5 KB · Views: 5
  • 59ABBD94-FE36-423E-9C17-5A36C42218EE.jpeg
    59ABBD94-FE36-423E-9C17-5A36C42218EE.jpeg
    198.5 KB · Views: 5
  • 6908CCBA-9555-45DD-876E-93F1D18CCD6C.jpeg
    6908CCBA-9555-45DD-876E-93F1D18CCD6C.jpeg
    194.1 KB · Views: 6
  • 6AE5A896-46DA-4E6F-8A4F-6D6E5B09CC72.jpeg
    6AE5A896-46DA-4E6F-8A4F-6D6E5B09CC72.jpeg
    242.4 KB · Views: 5
  • 1DADFD1D-0220-47BA-9C35-FCED492CD50C.jpeg
    1DADFD1D-0220-47BA-9C35-FCED492CD50C.jpeg
    151.7 KB · Views: 4
  • 41B822CC-9655-4BE6-9256-40A2BA904DB3.jpeg
    41B822CC-9655-4BE6-9256-40A2BA904DB3.jpeg
    133.6 KB · Views: 3
  • 178856A9-7EFB-40A9-9B24-A3A98E9BABDF.jpeg
    178856A9-7EFB-40A9-9B24-A3A98E9BABDF.jpeg
    145.2 KB · Views: 4
Last edited:
Wheelie bar disassembling, measuring, figuring out, etc. I posted some videos of it at work in the wheelie bar thread.
 

Attachments

  • 1CB0E867-CF93-487A-8DAE-536A523C5491.jpeg
    1CB0E867-CF93-487A-8DAE-536A523C5491.jpeg
    133.8 KB · Views: 3
  • F13A2E08-4515-408C-8B8E-94ECF4C5D137.jpeg
    F13A2E08-4515-408C-8B8E-94ECF4C5D137.jpeg
    162.2 KB · Views: 3
  • 12E0B1B9-ECC0-4A83-8A88-E074711F6476.jpeg
    12E0B1B9-ECC0-4A83-8A88-E074711F6476.jpeg
    157.1 KB · Views: 2
  • BD06D8E0-A865-4D4C-92F0-D6FB5DB5FD5A.jpeg
    BD06D8E0-A865-4D4C-92F0-D6FB5DB5FD5A.jpeg
    184.4 KB · Views: 2
  • 539A8A63-3C55-4AFD-A248-D378A674ADE5.jpeg
    539A8A63-3C55-4AFD-A248-D378A674ADE5.jpeg
    178.3 KB · Views: 2
  • 7368F211-CB47-441D-9EAB-6E2E198E014D.jpeg
    7368F211-CB47-441D-9EAB-6E2E198E014D.jpeg
    184.2 KB · Views: 2
  • C2B8C87C-6E29-4BB4-98F8-A342002E6350.jpeg
    C2B8C87C-6E29-4BB4-98F8-A342002E6350.jpeg
    191 KB · Views: 2
  • 2816B4BA-6EDE-4AAA-8991-B8583D0068D7.jpeg
    2816B4BA-6EDE-4AAA-8991-B8583D0068D7.jpeg
    205.4 KB · Views: 1
  • 9489B38F-DD24-4AA9-A1B7-6E6FFC673D39.jpeg
    9489B38F-DD24-4AA9-A1B7-6E6FFC673D39.jpeg
    135.6 KB · Views: 1
  • 1FFB5FDD-ED48-4F9B-ACD9-00D591E84232.jpeg
    1FFB5FDD-ED48-4F9B-ACD9-00D591E84232.jpeg
    122.5 KB · Views: 3
Last edited:
Axle came in. Kinda impressed, actually. It allows use of the stock inner pin. I had to drill my Hot Racing wheel hexes out (5mm) to eliminate the outside shoulder. I guess I didn't get a pic, but it also required me to run A LOT more spacers between the outer wheel bearing and the axle/hex pin to eliminate the inner/outer freeplay of the axle (due to this axles pin hole being drilled much more outboard, same reason I had to drill out the hex). I didn't count specifically, but I went from two 0.1mm thick shims to probably 20+. Nothing terribly concerning, everything still ended up fitting nice and tight with the hex on there, just something I will probably want to go back, measure, and replace with fewer, thicker shims to make servicing easier in the future. If these axles were made specifically for this model, I wouldn't be very happy with all the customization needing to be done but I'm glad there is something available other than "better plastic." I left the stock left rear axle in it for now, but after running the truck a few times I have zero qualms about this axle ever breaking.
 

Attachments

  • C1032C64-57F9-4D01-A10F-D55B2329546D.jpeg
    C1032C64-57F9-4D01-A10F-D55B2329546D.jpeg
    162.2 KB · Views: 6
  • 6A00A98A-E158-468E-913D-F74D22E391DB.jpeg
    6A00A98A-E158-468E-913D-F74D22E391DB.jpeg
    159.7 KB · Views: 6
  • 84658728-2A46-46D1-AAB4-324BCA76B57C.jpeg
    84658728-2A46-46D1-AAB4-324BCA76B57C.jpeg
    157 KB · Views: 7
  • B5CCC519-7019-42CB-9B23-05B652288004.jpeg
    B5CCC519-7019-42CB-9B23-05B652288004.jpeg
    156.5 KB · Views: 7
Last edited:
6F8BD901-1BA4-4AD1-B409-106D00A7E58D.jpegD73ED9CD-8B78-4664-BFC8-E1AFC6C1322E.jpeg

Had the wheels off, this is what I meant about the shims. Stock axle on left with two 5mm x 0.1mm shims between the outer wheel bearing and the pin. New axle on right with 15-20 to get the same. Have about 0.1-0.2 end play (inward and outward movement of the axle). I'm afraid any tighter would tend to side load the wheel bearings. If they were tapered roller bearings like on a car, I'd definetely shoot for zero
 
Last edited:
Fancy schmancy new wheels for the wheelie bar...I was looking for a little bigger diameter to effectively get more antiwheelie plus a rubber tire to (hopefully) do a small amount of dampening so it doesn't hit the bars so hard and upset the suspension. Traxxas 5186. Also upgrades it to ball bearings. The 0.5mm washers/spacers arrived so I don't have to run 22 or whatever the absurd number of shims was, haven't got them in yet.

Weather was bad, so bored I tossed the other axle in and the RPM rear A-arms. That was far more involved a job than I thought it would be motor/trans/rear shock tower all needed to come out. Next day take it to the park - his soccer practice got cancelled due to heat so I know of a park in a lot of shade where we can do swings and maybe run it on a different surface. Fire it up and click-click-click. Steering but no forward movement, ESC wires getting hot. Messed with it a little and with no obvious failure, just put it away before hurting something. Good thing I did, get home and try to rotate it over with the 7mm on the slipper clutch and motor/trans is completely locked. Removed the motor, it's fine. Trans is locked solid. WTF.

Take it apart, don't really find a smoking gun. All bearings look/feel decent. One of the 10x15x4 diff ones was iffy. With the case split, rotate the assembly is pretty okay but binds in one spot every time around (if watching the main big diff gear). No wear on the teeth. No chunks missing anywhere. Its definetely something with the big one, with just the two littles it rotates fine. There is a very faint mark on the inside of the case. My only guess is I ran a screw too far into the bottom of the trans and it bound up the big diff gear when I reinstalled during the rear LCA job. Ordered up everything new, case, fasteddy bearings, metal gears. I've had this thing apart and back together ten times and can't find a "smoking gun." In the meantime I'm going to see if I can clean up the tiny mark in this case with an xacto and see if I can get this going again as a backup. The ring gear on the diff has a little bit of runout, but who knows what the original tolerances were of gears like this made out of plastic. I don't know everything there is to know, but it's not often I get stumped mechanically.

Oh...and one of the axle allen bolts rounded off, in the new metal axle. That was a fun few hours drilling that tiny thing out. Those will be one time use from now on.
 

Attachments

  • 9C5F1585-7554-43A4-8579-9BB180717E80.jpeg
    9C5F1585-7554-43A4-8579-9BB180717E80.jpeg
    248.1 KB · Views: 4
  • FD09F17D-8009-4450-A4D2-B3CC02244AF8.jpeg
    FD09F17D-8009-4450-A4D2-B3CC02244AF8.jpeg
    263.2 KB · Views: 4
  • 02B8CCCD-262F-473D-A10E-7E9833196D47.jpeg
    02B8CCCD-262F-473D-A10E-7E9833196D47.jpeg
    228.1 KB · Views: 3
  • F88FBB80-444B-463D-8745-1542F436A99C.jpeg
    F88FBB80-444B-463D-8745-1542F436A99C.jpeg
    220.6 KB · Views: 3
  • BA1C4B04-50A2-48CE-8B6A-A5E997DCA24C.jpeg
    BA1C4B04-50A2-48CE-8B6A-A5E997DCA24C.jpeg
    172.1 KB · Views: 3
  • D04FB73E-7825-41EF-910B-36C38AF948D0.jpeg
    D04FB73E-7825-41EF-910B-36C38AF948D0.jpeg
    193.1 KB · Views: 4
  • 48FEC825-0A7C-4D88-9E10-A0AC5CFF75EE.jpeg
    48FEC825-0A7C-4D88-9E10-A0AC5CFF75EE.jpeg
    186.5 KB · Views: 5
  • 1E19065A-1C4F-4469-90A4-E5E1F204D7AF.jpeg
    1E19065A-1C4F-4469-90A4-E5E1F204D7AF.jpeg
    207.4 KB · Views: 5
Last edited:
Had some time to do some more digging around and cleaning. Trimmed out those very small protrusions into the trans case with an exacto - couldn’t even get pics, we are talking less than 1/16”.

Once getting everything really clean I could spot the impending failure of the input shaft gear - the pin is fine but you can see where the plastic gear is beginning to deform. For diagnostic purposes I cleaned it all up, packed the diff and the inside of the trans with waterproof wheel bearing grease, and put new bearings throughout. Reinstalled, much better. I must have just installed screws that were too long and they punctured the case and locked the diff gear.

767120AA-8168-4D6E-B141-58E2FD5A916E.jpeg

I still need to wait on the axle pins and slipper clutch to road test it, and a metal gear set is on the way was well as a new case. I basically ordered enough stuff to build an all metal trans and have a stock parts stuff one as a backup. HR no longer makes their locker which leaves me with a few thoughts to solve the open differential problems - 30000 diff fluid, chemically weld the diff (JB weld, etc), directly weld the spider gears, or put an entirely different diff in it so I can use an aftermarket locker. I ordered the fluid as it’s the non permanent option. I also ordered a SMT10 all metal aftermarket transmission, Amazon had it on Prime. I’m going to see how it looks and feels in person versus the metal gearset of the stock trans.
 

Attachments

  • 43B27ABF-252D-44ED-B840-5E35A6AF68A7.jpeg
    43B27ABF-252D-44ED-B840-5E35A6AF68A7.jpeg
    241.4 KB · Views: 3
  • 8FFA8B14-4FB0-434E-A25F-A087D446E496.jpeg
    8FFA8B14-4FB0-434E-A25F-A087D446E496.jpeg
    236.3 KB · Views: 3
  • 7F7606AF-5F7B-48B0-8441-BF57223FF7E8.jpeg
    7F7606AF-5F7B-48B0-8441-BF57223FF7E8.jpeg
    299.4 KB · Views: 3
  • 5C0A88BA-0050-4E9D-B22F-8D5600F6FEC7.jpeg
    5C0A88BA-0050-4E9D-B22F-8D5600F6FEC7.jpeg
    268.2 KB · Views: 3
  • 6D0B51FD-5EB8-430D-B49B-91B465F34653.jpeg
    6D0B51FD-5EB8-430D-B49B-91B465F34653.jpeg
    181.9 KB · Views: 3
Put RCAWD front shock tower and lower control arms on to try and get some weight on this front end (and stop supporting H-R). The inner control arm pin mount is so sloppy for two machined parts. I can’t believe the RC world accepts tolerances like this, on a bike or my racecar Id lose my damn mind. I may just end up putting the RPM arms back on it. Looking into some brass wheel hexes. Anyone have any other front end weight tricks (preferably low) before I just build a damn weight bar?

2ACE35EE-75BA-44BA-965A-63C376F5982C.jpeg

James thought shaking my Monster would be funny. This is the thanks I get.

BDFD8281-EDDF-49A0-9C2E-C4BA6A5E802B.jpeg

Playing around with the stock shocks (with 40wt and now aluminum parts) and the stock 4wd shocks.

Did a lot of cleaning up of our workspace you know how it gets with multiple projects. Mounted a fan to the ESC and while googling to find the right connector to plug into the diag port on Google found out dynamite makes a plug in fan unit. LOL.
 

Attachments

  • 1D706168-FEFE-418F-8967-6AE9073B6055.jpeg
    1D706168-FEFE-418F-8967-6AE9073B6055.jpeg
    196.9 KB · Views: 4
  • 729A72F8-C787-4B19-84AB-1BC96662E16B.jpeg
    729A72F8-C787-4B19-84AB-1BC96662E16B.jpeg
    216 KB · Views: 5
  • 36592048-898A-48C4-A33E-097684CA379C.jpeg
    36592048-898A-48C4-A33E-097684CA379C.jpeg
    189.4 KB · Views: 3
  • FF04E7CE-B140-438B-9B7A-2F056782523D.jpeg
    FF04E7CE-B140-438B-9B7A-2F056782523D.jpeg
    180.1 KB · Views: 5
Shock rebuilding. Have some stock ones off the 4wd mind as well while I’m at it. Took a screenshot of the Tazer ESC parameters just in case I think about bumping up the motor again. I did end up ordering that fan. Old transmission out, new Axial one in. Fairly bolt in affair. Refined my wheelie bar mount just a little again.

Not my original idea, here’s the link for credit:

It’s a locker trans. For what we do, that’s a plus not a minus. I’m building a spare stock trans with heavy diff gear fluid to try and get as close to a LSD as possible as a backup. I need to fabricate a wheelie bar to trans mount and a trans to shock tower mount (I will not be doing what he did in the video).

The unit is awesome (on the bench anyway) for the price. Here’s a video:


Attachments

  • F1AACEA1-8664-4547-84FF-E0D19ADEED7B.jpeg
    F1AACEA1-8664-4547-84FF-E0D19ADEED7B.jpeg
    186.7 KB · Views: 5
  • F6AD49D6-03AC-4287-A702-8EF1810D5C32.jpeg
    F6AD49D6-03AC-4287-A702-8EF1810D5C32.jpeg
    241.4 KB · Views: 5
  • 4D353E80-B587-4062-96A7-E4E3DDC9F8FF.jpeg
    4D353E80-B587-4062-96A7-E4E3DDC9F8FF.jpeg
    196.9 KB · Views: 5
  • E8845DE5-690C-4C36-897B-C6BD5A3018C3.jpeg
    E8845DE5-690C-4C36-897B-C6BD5A3018C3.jpeg
    78.9 KB · Views: 5
  • C1C79FE1-989A-4AD6-8D4C-223E8F4FE8E4.jpeg
    C1C79FE1-989A-4AD6-8D4C-223E8F4FE8E4.jpeg
    264.8 KB · Views: 6
  • FC42AF52-D24A-4C7B-A26B-72D59A04F131.jpeg
    FC42AF52-D24A-4C7B-A26B-72D59A04F131.jpeg
    241.4 KB · Views: 6
  • 66235BFF-5514-4783-B1E6-60E641DD8844.jpeg
    66235BFF-5514-4783-B1E6-60E641DD8844.jpeg
    200.4 KB · Views: 6
  • E31A7CC7-033C-47C2-9535-F3935EEE12FB.jpeg
    E31A7CC7-033C-47C2-9535-F3935EEE12FB.jpeg
    89.6 KB · Views: 5
  • A1243B55-B277-4A73-9989-52FA61E0C1FD.jpeg
    A1243B55-B277-4A73-9989-52FA61E0C1FD.jpeg
    152.1 KB · Views: 5
  • CA5888F2-59F8-4486-B3E5-052095979C10.jpeg
    CA5888F2-59F8-4486-B3E5-052095979C10.jpeg
    242.4 KB · Views: 5
Last edited:
Rebuilding shocks. Put 40wt in the 4wd ones, added RCAWD components to the stock 2WD ones (caps perches bottom heim etc). They don’t make anything for the 4WD ones but I was able to press Traxxas metal balls into them and I’m searching for a generic spring perch and a M3 rod end.

Shaved some of the stock upper trans mount to get it to fit and replaced the stock screws with longer ones. I think I may just remake this mount entirely. Drilled a hole in the fancy red trans cover so I can adjust the slipper externally. I’m looking for a rubber plug.

Looking at the new trans case, those screw holes do not go all the way through. So the original cause of the locked up powertrain was me installing too long hardware back in when I did the RPM rear arms.

I was originally going to leave the rear shock tower stock, went aluminum on the front trying to get weight up there, but having to make my own motor/trans to shock tower mount I wanted the tower as rigid as possible to start. I didn’t really like all the red up front and found this silver option from RCAWD.
 

Attachments

  • 89D38968-04C0-46F3-9EFE-6A721B0EF60B.jpeg
    89D38968-04C0-46F3-9EFE-6A721B0EF60B.jpeg
    106.3 KB · Views: 5
  • E35F14BE-96F9-44FD-B0CE-FFCC0E8B75BD.jpeg
    E35F14BE-96F9-44FD-B0CE-FFCC0E8B75BD.jpeg
    150.9 KB · Views: 5
  • 4F677A61-1F41-4FBF-9B87-6DAEC1EA1F33.jpeg
    4F677A61-1F41-4FBF-9B87-6DAEC1EA1F33.jpeg
    213.1 KB · Views: 5
  • 54945EE1-65C7-4E39-AED7-0996ABD6251C.jpeg
    54945EE1-65C7-4E39-AED7-0996ABD6251C.jpeg
    212.8 KB · Views: 5
  • A2D7C1AC-5A7F-4BC5-91F1-94A90948A563.jpeg
    A2D7C1AC-5A7F-4BC5-91F1-94A90948A563.jpeg
    119.9 KB · Views: 5
  • 6CA50211-A7C2-4DCE-9FBD-8F8B47F3360D.jpeg
    6CA50211-A7C2-4DCE-9FBD-8F8B47F3360D.jpeg
    121.6 KB · Views: 5
  • 141F1CB6-3618-4C39-889D-47D0490E600A.jpeg
    141F1CB6-3618-4C39-889D-47D0490E600A.jpeg
    180 KB · Views: 5
  • 03FCF644-0C78-43BE-96BD-DFD9A37EF60B.jpeg
    03FCF644-0C78-43BE-96BD-DFD9A37EF60B.jpeg
    178.1 KB · Views: 5
  • 8B5478CF-5B93-4974-825E-A01E46576E7C.jpeg
    8B5478CF-5B93-4974-825E-A01E46576E7C.jpeg
    171.2 KB · Views: 5
  • 4B063CF6-EB03-44D9-B674-C4B948FED34D.jpeg
    4B063CF6-EB03-44D9-B674-C4B948FED34D.jpeg
    134.8 KB · Views: 5
Last edited:
Silver front tower installed (had to get the matching pair, duh!). RPM arms back on. So much less slop at the pin. Not perfect, some of it seems to be the H-R lower suspension block as bench testing RPM arms to a new OEM lower block is tighter. But that block just offers me too much weight gain so low in the chassis. I am not a huge fan of aluminum arms anyway, I want something able to bend/break. I have brass wheel hex on the way for the front and worst case I’ll fabricate a weight bar for it.

4wd shocks ready to go they are 105mm like the stock 2wd rear but the shock is quite a bit stiffer with the same preload spacer and slightly larger diameter. At full extension, it binds the steering and bends the bell crank slightly (now that I have the RPM plastic unit in there not the H-R aluminum). But the 90mm stock 2wd front leaves some suspension travel on the table.
 

Attachments

  • 63466F0E-BAA7-49A1-AEAE-B356D99F4BEF.jpeg
    63466F0E-BAA7-49A1-AEAE-B356D99F4BEF.jpeg
    217.7 KB · Views: 4
  • E13E9E16-B7F0-4686-9BDB-7730E8823A54.jpeg
    E13E9E16-B7F0-4686-9BDB-7730E8823A54.jpeg
    251.8 KB · Views: 5
  • 561C732D-D08D-40ED-BCE4-D9FD0C2333A9.jpeg
    561C732D-D08D-40ED-BCE4-D9FD0C2333A9.jpeg
    159.6 KB · Views: 3
  • 85DD54C7-5D4D-4E8E-9A56-D7F5551394F7.jpeg
    85DD54C7-5D4D-4E8E-9A56-D7F5551394F7.jpeg
    148.6 KB · Views: 5
Last edited:
Front suspension is in except for the shocks. I’ve decided on the 4wd stuff for now, but I want to take between 5 and 10mm of travel out of them to get them to the 95-100mm range. I want as much suspension travel as possible without binding the steering. I have lower perches and metal rod ends coming so I want to wait to get those on first, it may make them a little longer. I’m trying to take advantage of this sets greater spring rate and rebound/compression in conjunction with the less in the rear to try and promote proper weight transfer on takeoff. Added stainless hardware. Rear suspension is done except for shock tower to trans mount. Both need to be aligned.

Had some spare time so put together the spare trans in case I don’t like the Axial locker. New case, all new Fast Eddy bearings, metal gear set, 30k in the diff and waterproof wheel bearing grease in the main trans, stainless hardware, new slipper, HR steel 48p 87t spur. Basically a brand new trans other than the input shaft, the pin, and the shaft for the center idler gear. It’s probably going to remain an expensive ornament inside our parts bin, LOL. Some sick part of me wants to put some big power and big traction to this and see what the limiting factor of it is, like a 3674 on 4S or see if you could cram a 42 series in there many can go 6S. What’s gonna give first? My money would be the metal gears and pins exert too hard on the plastic case and split/slot it. Maybe the 2 mount holes for the motor aren’t enough and the pinion to spur mesh grows under power and eats a gear.
 

Attachments

  • F21ECF1A-06BB-4B7C-884D-1B24E6097AFB.jpeg
    F21ECF1A-06BB-4B7C-884D-1B24E6097AFB.jpeg
    127.7 KB · Views: 5
  • 2B979C77-8C4A-4179-871C-30D5A5543698.jpeg
    2B979C77-8C4A-4179-871C-30D5A5543698.jpeg
    226.7 KB · Views: 4
  • 002F2007-B590-4E42-B79F-E238E4828689.jpeg
    002F2007-B590-4E42-B79F-E238E4828689.jpeg
    214.5 KB · Views: 3
  • 21C344A5-8380-49AB-A2BC-F932B6EAE13E.jpeg
    21C344A5-8380-49AB-A2BC-F932B6EAE13E.jpeg
    209.5 KB · Views: 3
  • 5055CDBC-D54B-44F9-AB63-E18A1D8E10BF.jpeg
    5055CDBC-D54B-44F9-AB63-E18A1D8E10BF.jpeg
    166.7 KB · Views: 4
  • BF9C026D-C079-45B8-8FE6-D272C0EBD18B.jpeg
    BF9C026D-C079-45B8-8FE6-D272C0EBD18B.jpeg
    171.5 KB · Views: 4
  • 3C5519E4-825D-4579-8A64-1D113D8ABE52.jpeg
    3C5519E4-825D-4579-8A64-1D113D8ABE52.jpeg
    134.3 KB · Views: 4
  • 204A9E78-0F18-40BD-B6FC-DC2A86C90D7C.jpeg
    204A9E78-0F18-40BD-B6FC-DC2A86C90D7C.jpeg
    162.3 KB · Views: 5
  • DD087F5A-ABEA-411A-8045-3A441897BF94.jpeg
    DD087F5A-ABEA-411A-8045-3A441897BF94.jpeg
    145.9 KB · Views: 5
Last edited:

Members online

Back
Top