95PGTTech 1/10 2WD ECX Ruckus build

Wires arrived so I put the 3674 2250kV back in with the same 26 pinion
9B285BA6-8E43-46E1-9528-1E62547270CC.jpeg567E2E9F-D721-4EE3-9605-CE583E823EBA.jpeg


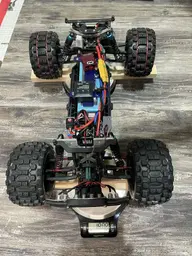
Added a fan to the motor - not really sure I need it, but the kid geeks out about fans so whatever.
3DA5736F-81F7-4060-AD73-F946D6B7569C.jpeg


Runs really, really cool now even in the tall grass. Super easy to drive not really rowdy at all. This is definitely the right combo for it. Did a lot of ESC programming settled on punch full, brake 50%, drag brake 16%. Front end is a little low so I put another preload spacer in there instead of ditching weight because it flies so straight and handles well how it is now. One issue we keep having is cell 2 drops to 2.9v and sets the alarm off while the other two cells are still 3.05v-ish. It balance charges fine to 3.20v all cells. Battery is only a month old.
65DE2D7B-CFE6-4851-A62E-E67366EB52D1.jpeg271332E6-3FA8-4E3F-AB8A-C7E039A30C87.jpeg


We finally got some rain after a very dry summer I’ve been trying to let the grass go uncut and get a chance to recover.
35E9394A-01DC-4CE1-8799-20D8F901E989.jpeg46ACE6C5-F5CB-494D-8701-74FECBEA0A5F.jpeg835D1C52-A27F-42BD-A0C4-982003F40609.png


I was curious just how much mph the drag is costing so we ran it on the pavement. 40mph. I really thought it would be more. I have a 28T pinion we may try just for the hell of it, but to go any bigger ratio we will need to go to a smaller spur. Really happy with how stable it is at speed and easy to drive, it used to be really twitchy and just want to constantly wheelie.


Attachments

  • 22371D3A-C00B-4367-8476-4734A23F152A.jpeg
    22371D3A-C00B-4367-8476-4734A23F152A.jpeg
    459.6 KB · Views: 4
  • D8BE42DE-F992-417A-9F05-490212AD15CC.jpeg
    D8BE42DE-F992-417A-9F05-490212AD15CC.jpeg
    447.8 KB · Views: 4
28T wouldn't fit, and we were more or less room temp on the motor and ESC, so why not. 81T installed. Did the same method of making my own clutch pads out of gasket material. Old ones looked pretty darn good considering how hard we ran them and how long they'd been in - see previous pages in this thread and others of how we *destroyed* stock ones. Cut the full face of the spur, not just the stock gasket size. Hit them and the friction disks with 60grit. Extra M4 washer on top of the spring, don't run a nylon locknut run two M4 nuts locked together and red loctite. Full tight backed off 1/6 turn (one flat of a nut). 26/81 is the current combo, which is almost exactly equivalent to what going to 28/87 would have been. I figure I have enough room now for a 32, maybe a 34 pinion if I "need" to. Included a pic comparing the diameters of the spurs by overlaying them, and a pic of how much room is gained with the 81 before I set up the mesh (leaving the 26T pinion in place where it was installed on the 87).
IMG_6038.jpgIMG_6039.jpgIMG_6040.jpgIMG_6041.jpgIMG_6042.jpgIMG_6043.jpg


Rainy day and had it somewhat apart, checking everything over play in the left rear wheel again and destroyed another wheel bearing. Outer one this time. At this power level this just seems to be a regular maintenace/abuse item. I set them up tight, I set them up loose, I set them up in between. 5-6 packs through it and at least one of the rear wheels, usually the left, needs a bearing. Inner one was so good I cleaned and reused it. I don't use cheap bearings, I get everything clean, I use bearing lube, I have watched every video I can find on shimming them, not sure what else to try or if this is just an inherent flaw of this design.

IMG_6044.jpgIMG_6045.jpg


Did 37 in our yard. Limited by space at this point, we need to get back out to the park. Ran it once on the street just to test the gearing and it did 44 so the gearing was good for +4 theoretically. Ran nice and cool even on the new gearing back to back to back hotlaps. I think I'm going to bring a 4S with us when we go to the park next week. And the 28T pinion. Maybe we will take some ballast weight out of it and see what happens. It's driving so well, why not?
IMG_6046.PNG
 
Sudden loss of all steering on one of our normal daily drives around the yard after making a few hits. The stock plastic M3 rod that ties the servo arm to the RPM steering saver (basically the only stock part from the servo all the way to the knuckle) just straight pulled the threads out of one of the plastic ball ends. Figured that'd happen eventually. During teardown, the servo stopped functioning entirely. I have another exact replacement, threw it in and works no problems. For what these cost, not really worth me cracking it apart and figuring it out but I think it internally shorted somehow because it was backfeeding the receiver and making it do weird things.

IMG_6061.jpgIMG_6063.jpgIMG_6089.jpg


I can't stand Hot Racing and their Hot Garbage parts, but nobody else makes a steering setup other than them and RPM. I've been kicking around the idea of using a linkage rod to completely eliminate the giant vertical standoff our steering geometry has which I attribute to all the bent arms. I found that Traxxas makes a m4 link in the right length (go try and find a 20mm eye-to-eye adjustable link...LOL). Both parts should be here tomorrow.

Put the 4S 100c in. Why not, LOL. I think I'm going to weigh this battery and the 3S later and the difference I'll take out of ballast in the nose as a starting point. Going to soften the rear suspension a little by moving the shock mount points to see if I can help with it constantly picking up the inside rear tire on hard cornering. Maybe that's just a function of running a locker too. Maybe I need a sway bar. Always something to tinker with.
IMG_6090.jpg
 
Moved rear shocks upper mount inboard to soften the rear suspension and possibly reduce some of the roll in back. I quickly moved it back as it negatively affected the wheelie (coming back too hard) which is the primary concern. Maybe I'll explore a sway bar
IMG_6094.jpeg


Weighed it with the 3S and 4S. Got some new tungsten weights and putty, trying to make a combined weight in that little pocket that is secure in there and doesn't flop around but is also easily removable in case I need to get to the two bolts that hold the steering/front end on. Wheel weights worked for awhile but are inflexible in such a tight space so I'm limited on how many I can use. They aren't very dense either. Keeping the tungsten weights in the little baggie for now to make sure they don't get lost/ejected. I'm thinking about stealing some of my kids kinetic sand stuff, it's like playdoh that never hardens. That would take up the volume nicely and I could just press the tungsten weights in there and it would be easy to take out when needed.

IMG_6096.JPEGIMG_6101.JPEGIMG_6102.JPEGIMG_6103.JPEGIMG_6104.JPEGIMG_6105.JPEGIMG_6111.JPEG


ended up at 1482 front and 2164g rear after driving it around a bunch with different combinations. I'm not terribly concerned about the accuracy of the weight, moreso the ratio because that balance dictates how it handles. It amounts to 59.3% rear bias, which is nearly exactly the same ratio as I started the day with the 3S battery and loving the way it drove (1429/2083). It absolutely does wheelie more, but I think that's simply a function of the increased power added. For sure now we have outgrown our property, at no point on a pull can I get anywhere near full throttle. I will bring ballast to the park the next chance we have to go there (probably Thursday after school).
 
Last edited:
Hot Racing bellcrank came in. This company is such a joke, they ship the bellcrank with SAE threads 4-40 that are supposed to bolt up to a stock chassis. I modified a Traxxas steering link to replace the one I eventually pulled the threads out of, and you can see how I eliminated the huge stock-style standoff from the servo arm. I attribute bending previously two H-R bellcrank servo arms to this...big torque from the servo trying to push big front wheels through a Chinesium lowest bidder alloy steering arm just twisted it. Hopefully this geometry helps. You could visibly see the strain in the RPM one, but that's plastic polymer so it had some give it didn't just bend the arm. I even tried having one of the H-R arms welded, but the alloy is just so cheap and full of impurities welding just punched holes in it and had contamination marks. I tapped and threaded the bellcrank to M3.

IMG_6107.JPEGIMG_6109.JPEG


I changed the alignment to -1 camber at all four corners (from -2) to try and improve top speed stability and reduce turning bite (it still grip rolls on grass).

IMG_6110.JPEG


Despite being able to get nowhere near top speed on our property, we were able to run the 26/81 hot lapping it for a good half a battery and the motor and ESC were still luke warm (the fall 70s ambient also helps!). I left the 26 in it when we switched to 4S, and really no change, so I threw in the 28. We are a LONG way from the stock 18/87 LOL. Not that we are particularly chasing top speed, but that high gearing really helps keep the front end down and overall make it more fun to drive, and if the motor and ESC temps can handle it...why not? I ended up finally having to clearance the gear cover because we are so large on the pinion.

IMG_6112.JPEGIMG_6113.JPEGIMG_6114.JPEGIMG_6115.JPEG
 
Took it out late at night to play with the lights, kid loved it. Came back in to a bent right rear shock. Straightened it out as best I could with needle nose, I guess I know what the next upgrade will be. I have GTR XXLs on the 4wd and really like them, maybe something like that.

IMG_6126.JPEG


Beautiful day, we got a chance to go to the park (and bring mom and his two brothers since she took the day off work) and make a hit. Couple of warm up part throttle stuff just to get warmed up and make sure it wasn't going to overheat, then one good rip. Good in the sense we were able to go full throttle at the end of the run, not great in the sense I think there's more in it if we can ramp into the throttle a little sooner. Even at the end it still wanted to wheelie. Rear tires were balooned so crazy I thought they were going to explode. 28/81 the motor and ESC barely got warm to the touch. There isn't anything smaller than an 81 available, I think the limit is going to be what size pinion we can fit before the motor hits the chassis.

I thought I heard a noise and saw a wobble at the top end, parked it and walked down instead of driving it back and all seemed well. Driving it back real slow the left front wheel falls off guess that was it. :ROFLMAO: Didn't have a spare nut or the tool to put it on, so it ended our RC day.
IMG_6123.JPEG


But not before we shattered his personal best for the truck (this is faster than anything it's ever done on any surface, I'd imagine it's in the 60s on pavement). If we hit 50 on grass, I'm going to submit an eligible video to the off road speed list.
IMG_6122.PNG


Time to get these junk eBay axles out. MIP X-duty. I have a set of skinny belted Badlands I may try on the front and see if it makes a noticeable difference pushing less through the grass, and we are probably going to continue to add weight. Trying to find pinions > 28T in 48P 5mm is a pain, but I'm looking.
IMG_6124.JPEG
 
Robinson Racing 48P 5mm 31T is in the mail. While I'm putting that in, I'll try and take some measurements and see what the absolute max I can put in is (guesstimate). If I need it, 33-35-37-39 is readily available.


I've been building an AX10-derived bulletproof transmission for this thing as a background project and one of the issues I've anticipated is that as a crawler, they may have a vastly different gear ratio in the transmission. It's 2.60:1 for the stock AX-10 one, and there are many aftermarket offerings (1.80:1, etc). I couldn't find any concrete evidence on what ours is, except for one thread:

https://www.ecxforum.com/threads/circuit-transmission-ratio.1252/

Which includes a screenshot of an archive of an old dead forum which states the ecx 2wd transmissions are 2.64:1. I take everything with a grain of salt, that was coming from some random poster not a part specification or the manufacturer. I have plenty of spares so I just went and counted teeth. 25 on the input, 28 on the idler (irrelevant in a compound gearset), and 65 on the differential. Counted it three times, what a pain in the butt. Put it in the gear calculator, 2.60:1 for anyone who needs the info for future use. So, at very least, the aftermarket gearset I put in this AX-10 one should be stock ratio or taller.
IMG_6143.jpeg
 
I've been running the shocks of the Losi DB Pro on my Rustler and they have been working great so far. Jennys has them for about $20 a set but you also need the shock standoffs that only come in a parts pack that costs $20 as well.
 
I've been running the shocks of the Losi DB Pro on my Rustler and they have been working great so far. Jennys has them for about $20 a set but you also need the shock standoffs that only come in a parts pack that costs $20 as well.

Any particular reason you chose to buy them, or is it something you just had on hand from other builds?

Jenny’s is awesome and about a half hour south of me. I wish he’d let me pick up. I could get parts even faster and I’m sure if I took a look at his inventory I could justify walking away with much much more than I intended to buy

I watched a video from Razorrc where he stuck TLR SC shocks on his Rustler(I cannot remember the exact ones), the DB Pro shocks are similar to the SC shocks he used just the DB Pro shocks are made in China where as the TLR shocks are made in Taiwan. But I feel they were well worth the price and they look nice too. Aluminum threaded bodies, almost the same exact eye to eye measurement as the stock Ultra shocks. Suspension feels so smooth and plush with the stock factory Losi setup.

I'll probably get a set for the Ruckus and the 2Pede.

The stock shock screws from the Rustler are too small for the Losi shocks, the Losi standoffs didn't have enough offset for the front so I had to use Outcast 6s V1 shock standoffs to clear the front shock tower and I had to make a small spacer out of nitro fuel line to keep the shock from sliding around on the standoff.

20220923_192432.jpg
 
I watched a video from Razorrc where he stuck TLR SC shocks on his Rustler(I cannot remember the exact ones), the DB Pro shocks are similar to the SC shocks he used just the DB Pro shocks are made in China where as the TLR shocks are made in Taiwan. But I feel they were well worth the price and they look nice too. Aluminum threaded bodies, almost the same exact eye to eye measurement as the stock Ultra shocks. Suspension feels so smooth and plush with the stock factory Losi setup.

I'll probably get a set for the Ruckus and the 2Pede.

The stock shock screws from the Rustler are too small for the Losi shocks, the Losi standoffs didn't have enough offset for the front so I had to use Outcast 6s V1 shock standoffs to clear the front shock tower and I had to make a small spacer out of nitro fuel line to keep the shock from sliding around on the standoff.

View attachment 8676

They look like nice pieces. You don’t happen to remember the eye to eye do you? I think these 4wd shocks were 110mm I’ll have to go back and look. How thick are the shafts? This one bent right at where it meets the aluminum rod end for the lower eye. I bent it back for now but I’d like to start planning a replacement/upgrade. Definitely something big bore and threaded body.

The GTR XXL are only 100mm. Meh.
 
One of the benefits of having kids is having access to some stuff I wouldn't normally have to try. I wanted to continue adding weight to the nose section of the truck, but I needed something more dense than the wheel weights because they were taking up a lot of space and leaving a lot of air gaps. So I got those tungsten weights for those wooden car competitions, but I don't really like those bouncing around in there unsecured. Normally I'd just figure out what weight worked best then fill the cavity with epoxy or something, but there are two screws in the bottom I can't lose access to for the future. I thought of pouring lead, it would conform to the shape exactly, but there's no way the plastic would hold up to that heat. Something along the lines of playdoh to take up those air gaps between the few wheel weights I still have in there and the tungsten weights. They make a tungsten putty but that's not exactly easy to form/work with either. My son and I were playing with his Kinetic sand and that gave me an idea to try it.

Unfortunately, the amount of volume I'd need to add to the weight I have in there now to get the weight I want is considerably more volume than I have to work with. It also doesn't really hold its shape like playdoh, you can see it kinda spreading out on the scale. I did a side by side with tungsten putty - that's how much you need to get the same weight as that amount of putty! Oh well, we tried. I'll order more tungsten putty and tungsten weights. Maybe when we get the weight we finally want, lining the inside with something and then pouring epoxy is the answer. Ballast is good - ballast bouncing around all the place is not good.

IMG_6156.JPEGIMG_6157.JPEG


Still playing around with how I'm going to arrange everything. The wheel weights inside the old receiver box are definetely the best use of that space there. They just seem to get in the way everywhere else.

IMG_6158.JPEG


This is how his workshop looks more often than not :ROFLMAO:. All 3 of my kids go down for a nap from 2:30 to 5, and I use that time to have a cup of coffee and listen to some music and tinker, my way of meditating. I do the boring, overly technical stuff and save the fun modifications like putting in new motors and shiny bits for working with him. Getting ready to finally ditch our eBay hardened steel axles for MIP X-duties. I needed to order a spacer kit that I didn't have for them.

IMG_6159.JPEG
 
Went to remove the pins from the axles and found BOTH of them broken. Luckily, no other damage done and I was able to drive them out with a punch. If I remember correctly they were the stock ECX ones reused, I don't think these axles came with them.

IMG_6161.JPEG


Side by side of the MIPs and the eBay ones. The most significant difference is the joint design. MIP says each joint will function just fine up to 35 degrees. From the trans output shaft to the axle at the hub, this allows for 1.60" maximum travel (in each direction up and down from neutral), at the slash axle length. More as the axle gets longer.

IMG_6162.JPEG


My biggest criticism of the eBay stuff is slop. They seemed decently tight out of the box, but over time the center large pin of each u-joint starts wearing into the holder. You can see how this one has slotted its opening a good 2mm. Imagine this at both joints of the axle. With the wheels in the air, we were able to rotate them more than 90 degrees before teh trans output shaft would start turning - a TON of slop. Not only is it losing efficiency in the driveline, it's shockloading the driveline when it finally "catches." I think these were $40 for each set - considering how long we've had them in and that they haven't completely failed to the point the truck doesn't run, I'd give them a B+. For someone on 2S or a mild 3S with a slipper that's not terribly tight, these would probably be fine.

IMG_6163.JPEG


Robinson Racing 31T 48P pinion installed (31/81 or 2.61:1 now, from 18/87 or 4.83:1). I will need to shoot temps on this one, but to go any larger the bottom slotted motor mount hole needs to be enlarged, and I may run into the motor hitting the bottom plate. This one is so large I actually had to get rid of the stock motor screws with their thick washers and lock washers and go to button head allens with thin washers and loctite to get clearance. I think this is the limit of practicality as far as gear ratio goes. The AX10 trans going in is all 32P stuff, plus it also has a much lower internal ratio so hopefully I won't have to go to such extremes on the ring and pinion.
IMG_6164.JPEG


The pinion is so large that it needs to be installed more distally on the motor shaft, to the point where it doesn't line up with the spur that great. At a lower power level, this probably wouldn't matter. I was able to rectify the problem with a 0.5mm spacer behind the spur in addition to the factory ECX one. I tried a 1.5mm spacer to give even more room to work, but this doesn't allow the front clutch plate to still sit on the flat of the input shaft so no-go.

IMG_6166.JPEGIMG_6165.JPEGIMG_6167.JPEG


The X-duty's completely eliminate the axle pin and use a set screw locking the hex to a flat in the outer axle shaft...LOVE IT. Completely eliminates bent pins and shimming BS. On a slash there is a small spacer that comes with these axles for between the inner and outer wheel bearing to prevent binding, on this XO-1 hub there is a machined lip to do just that. I set the hex as tight as I could while still getting free rotation of the axle. I was pleased to find all 4 bearings in the rear in good shape still, just cleaned and oiled them.

IMG_6172.JPEG


Something I was worried about was because of the increased outer diameter of the axle joints possibly contacting the rear camber link, a problem we've already run into before. With it installed on the inner bolt hole, it's very tight. Link installed on the outer hole of the rear shock tower, I can stick my 2mm allen key in between throughout the entire articulation of the suspension.

IMG_6174.JPEG


Something on the to-do list was to replace the rear camber link's inner rod ends (the ones that keep popping off). This had to wait for the motor to be out, only way to access those screws other than pulling the rear shock tower, which is arguably more work. I put RPM long rod ends on both ends of the Traxxas rod linkage, as shown at right. Left is a stock outer Traxxas end with the RPM shorty blue inner end. It was just too thick for the space available.

IMG_6175.JPEG
 
Now just running one "Traxxas" PTFE shim between the outer wheel bearing and the wheel hex. I ordered MIP 20500 spacer kit, going to send it back we really don't need it for installing on our vehicles if using XO-1 hubs. You can kinda see the machined flat in the outer axle stub. A much better setup than a pin and the associated weak point it puts in the axle, IMO. I have pics in this thread of where I was able to break axles at said weak point before, albeit using them in a way probably more abuse than designed. All set and ready to drop the motor/trans back in. Just quick eyeballed it camber.

IMG_6176.JPEGIMG_6177.JPEG


Set new alignment more for speed running. -1 camber all around, 1/16 toe in front, the rear toe is non adjustable and set by the XO-1 hubs at 1.5 degrees toe in (or you can flip them for 3.5).

IMG_6173.JPEG


Just a quick note, the MIP instructions are adamant about the pins for the inner and outer joints aligning. I'm going to guess from my car experience that this probably has to do with keeping the joints in phase with each other, but since they made such an effort to put it in multiple places in the instructions I'll just run it how they want it.

IMG_6178.JPEG


All back together. Waiting on more weights to arrive.
IMG_6179.JPEG


Finally got the bottom box with the wheels to complete James's setup. Normally we take the truck, one battery, body, GPS, radio and go run it and if something breaks, that's the end of the day. We had a really nice day ended by a wheel nut last time out, and I'd like to do more back-to-back testing to see how various changes have effect.
IMG_6181.JPEG


We have had a few rainy days here from the effects of the hurricane, so plan is to get out to the park next week after school, probably Wednesday or Thursday. Shoot some temperatures on this 31 pinion, but I also want to bring along a stock body we still have and see if that makes a change. I also have the skinnier belted MX28s, I want to throw them on the front and see if the less rolling resistance makes any meaningful difference. If it does, I may get another set and see if running them on all 4 corners helps. These big Badlands balloon at speed really big, so I'm sure some mph will be lost in that respect but possibly gain a bunch of high end stability.
 
They look like nice pieces. You don’t happen to remember the eye to eye do you? I think these 4wd shocks were 110mm I’ll have to go back and look. How thick are the shafts? This one bent right at where it meets the aluminum rod end for the lower eye. I bent it back for now but I’d like to start planning a replacement/upgrade. Definitely something big bore and threaded body.

The GTR XXL are only 100mm. Meh.

Fronts 85mm eye to eye
Rears 100mm eye to eye
I would have to check the shaft size.
 
Got it out for two sessions on the lawn over the weekend. We have a total of 13oz of weight in the nose right now and it still will power wheelie full throttle any speed. Put an extra half preload spacer in the front shocks. Temps seem to be just fine on 31/81. It is starting to struggle from a stop if it's in tall grass, so you can either start it on gravel or just give it a little nudge. To be expected as gearing increases on a sensorless motor. Ran a full pack through it and was 130F motor 110F ESC on one session, really lugged it part throttle through tall grass another and saw 150F at the motor. Hard pulls barely put heat in it at all, it seems to like working at full speed more than anywhere else.


Not that I was really trying to hit a number, but I never saw more than 35mph on our grass limited by space. Threw it on the street to make sure there is enough gear to do what we want to accomplish and hit 55mph on this pass before having to let out. Rear tires ballooning way too much (you can hear them actually hit the body) causing steering shake. We will see what it does at the park, but I'm probably going to need to get another set of belted skinny Badlands or DIY belt these ones with fishing wire. Got the GPS set up on an old phone so I can show the GPS in the video for a qualifying video when we go out. Nice to know the truck has it in it, and more...we just need to find the space to do it.

 
47mph wheelies, that one was a good hundred feet or so. This is the real battle with 2WD

The reality of having a driver who isn't quite 4 yet is sometimes it all doesn't go right. GPS data said this run topped at 44mph and struck at 25mph


Luckily damage wasn't too bad. Killed one of the LED lights in the bumper and bent both rear shocks (worse than they were before).
IMG_6222.JPEGIMG_6223.JPEG


I ended up tearing down the front end chasing a bad right front wheel bearing, and while doing the other side found this mangled left steering knuckle. Unsure if it was from that hit or not. I ordered some generic Amazon no brand stuff to replace it, I can't stand H-R.
IMG_6262.JPEG


We've been doing a lot of trial and error stuff lately, one of which was to band/belt the rear Badlands. There is *A LOT* of videos and posts and theories out there on how to do it (or if you should and it even works), so what I ended up with as a first try was this 50lb braided fishing line
https://www.amazon.com/dp/B003I3EF2U?psc=1&ref=ppx_yo2ov_dt_b_product_details

I chose to do two "belts" of four wraps each, then tied with a standard knot x 5. Just tight enough to hold its shape, not tight enough to compress the tire any more than its relaxed position. I left an inch and a half excess on each of the ends, then wrapped that with tweezers around the belts. I positioned the knots directly next to a big double knob so it wouldn't be the first thing hitting the ground and offset them by 180 degrees. Light coat of super glue to the entire belt all the way around. So far, it's holding up really well and doings its job of keeping the tire from balooning badly.

IMG_6242.JPEGIMG_6243.JPEGIMG_6248.JPEG


We also added another tungsten putty load (2oz for a total of 15.5oz, plus the front bumper and all the relocated weight brings it now to 1810F/2286R for 55.8% rear bias). Experimented with putting the skinny belted Badlands on the front to reduce rolling resistance. Didn't see any mph improvement, and obviously the decrease in weight didn't help either (185g vs 233g). I get the impression that the front end is still so light under power that the increased width of the bigger tires really makes little difference it's probably floating on top of the grass more than anything. Overall with the changes it seems more stable at speed.

IMG_6260.JPEG

We ran a new personal best on grass, uploaded the video to the speed run list and we're waiting back on official confirmation before announcing anything. I will say on the street, at night, letting out of it (because I was scared of a catastrophic crash) we did run an insane 60mph two nights ago with the cells at 4.05v. Doing that kind of speed with eight 5mm LEDs as your only visibility is butt puckering for sure (the kid doesn't care he knows one throttle position LOL).

IMG_6278.PNGIMG_6280.JPEG
 
Last edited:
Continuing to adjust preload on the front and rear shocks as we increase and decrease the weight. I think two full spacers rear and one and a half spacers front seems to be the ideal setup.

IMG_6249.JPEG


I honestly cannot stand the utterly terrible tolerances the RC world lives with. I tore apart the right from to find the outer wheel bearing completely missing every single ball bearing, and yet the front left which is completely intact has just as much 6/12 play at the wheel as a destroyed bearing does. Like...what's the point of setting my camber when there is so much play that I can set it to -1 degree and articulate it from +1 to -3?

IMG_6259.JPEG


We decided to stay with the wide front wheels after trial and error. The need for their increased weight that far up front just outweighs any concern about how much rolling resistance they increase. Since they aren't being powered like the rear wheels, they don't baloon. I did chose to swap the wheel centers to the narrow offset that were on the skinny belted 2.8 Badlands, figuring any decrease in track width up there decreases the total front wind resistance. We have yet to experience it, but other off road speed guys are saying aero starts to come into play between 50 and 60mph. My current theory is that our front-end-lifting problems are still more of a power and weight balance issue than a aero/body lift issue because the front end lifting seems to occur at any speed based upon throttle position. I have a stock 2WD and a stock 4WD body (the nose is very slightly different), this modified body, and I'd like to run it no body in the future in back to back passes to get some conclusive data on if aero is a concern for us at this point - I forget which but in one of these pictures you can see I moved the GPS from the blue body to the battery mount specifically so we can do that (and to protect the GPS).

IMG_6266.JPEGIMG_6261.JPEGIMG_6267.JPEGIMG_6268.JPEG


Also finally got around to ordering a crimper and shortening the servo, ESC, and front bumper light wires to make it a lot cleaner. Wasn't terribly hard just time consuming. Found a really good video on YouTube that made using the tool pretty easy. I cannot shorten the wire from the ESC to the power switch - if you take apart the ESC and the power switch you'll see that the wires are soldered to the board in each, then poured into clear epoxy. So it will just have to stay zip tied like that, as will the motor temp sensor wire on the other side.

IMG_6263.JPEGIMG_6264.JPEG
 

Attachments

  • IMG_6265.JPEG
    IMG_6265.JPEG
    219.2 KB · Views: 2
Last edited:
I am more or less maxxed out on gearing at this point using factory-ish ECX parts. No one makes smaller than a 81T pinion. I took a look at some 32p conversions, and although the numbers are different, the ratios work out the same (there's actually more selection in 48p, which I prefer anyway). There's not a way I'm getting larger than a 31T pinion in there without starting to modify the motor plate, and even then I'm not getting much more room than that. a 33T could be made to fit for sure, *maybe* a 35T. I've been exploring some other options, and that's when I remembered I still have a set of massive MX38 belted Badlands.

I ordered up a generic Amazon 12-17mm hex conversion kit so I could throw the bigger wheels and tires on as a gearing experiment. I have a set of XO-1 hubs (Traxxas sells a conversion kit) but those need axles with pins to work and these MIP axles are machined flat, not pins. The kit went on with no issue.
IMG_6269.JPEG


The MX38s look *hilarious* on a 1/10 scale, and the rake makes it look like some sort of cartoonish farm tractor. I ziptied the back of the body's "truck bed" as it was clear they were going to hit on any sort of suspension compression.

IMG_6273.JPEGIMG_6270.JPEGIMG_6271.JPEGIMG_6272.JPEGIMG_6274.JPEG


Effectively what I'm trying to do again is give the truck a radically tall final drive ratio as an experiment to see if there is anything to be gained by continuing to chase gearing. Why bother putting all that work into going +2 or +4 on the pinion if it's not going to make any difference. I also expected the huge jump in ratio and the natural rake the larger wheels caused to effectively eliminate wheelies at all speeds...which was absolutely and totally incorrect. Somehow, especially on grass, it wheelies even easier. It's like I was trying to design a wheelie truck. 15mph and it's standing on the bars. Granted, it comes up nice and straight and handles terrain pretty well with the wide, soft tires, but still. Another dramatic difference was, sometimes even on gravel or pavement, it needs to get a good 5mph roll or push just to get moving. The motor can't make enough torque to overcome the rolling resistance and get it moving. I was really, really careful with the setup not running it as bravely as I normally do this truck because the last time on these tires I rolled it and all the stress of those huge wheels snapped an axle and I really didn't want to do that to these MIP units (though, they are much stronger and don't have an inherent weak spot with a pin). Still, the best I could manage was 48mph on grass. 120F ESC and 130F motor after a few passes back to back. On the street, just to get an idea of what the gearing could do, 59mph at 3.80v, and the motor and ESC remained cool enough temperatures that measuring it was irrelevant (so long as I started it on a slight downhill). Middle of the pull I was definetely hitting ESC cutout.
IMG_6277.PNGIMG_6275.PNG


I think part of what my experiment ran into was the massive amount of energy it takes to get these moving 425g (vs 233g for the home-belted Badland MX28s), plus the larger diameter means that mass farther out centrifugal force yaddah yaddah. According to the final drive calculators, these 6.80 diameter tires on the 31/81 gearing are roughly equivalent to the MX28s if I went to a 42/81 - roughly a 3.15:1 rollout with a theoretical top speed of 112.56mph. I think that mass is also what causes the wheelies - the wheel and tire really doesn't want to move, so with a tight slipper that energy is put into twisting the whole RC around the wheel.

It wasn't a complete waste of time. Our previous best on the road was 55mph (that 60 didn't come until a day after this, sorry I'm behind in updating our content), so this speed does indicate to us that there is more to be had out of gearing more aggressively, just that it needs to be done at the transmission not at the wheel. One of the options I was talking about was going to a Team Associated 48p spur. It will need some modification to make it work, but they offer quite a few options below 81T. I'm going to put the smallest spur I can find and aim for as close to the final drive we achieved here (seems to be something like 37/69). The fact that it wasn't overheating on the road tells me that number should be a good starting point. If I was able to order bunches of pinions I may feel differently and work my way up one at a time, but up in these unique sizes it's a one-at-a-time deal at $10 each and a five day wait.

IMG_6281.JPEG
 
Team Associated 9648 - 69T 48p spur, overlaid on the 81T H-R spur that came off (the stock is an even bigger 87T). The center hole needs to be enlarged to 5mm - I put a 5mm drill bit into a tap handle and opened it slowly by hand, I was afraid my drill or drill press would overdo it. Here is it pictured on the stock transmission with the 31T pinion in the maximum tight position - ordered up a 37T pinion. Robinson Racing hardened, as always - should be here tomorrow before end of business day.
IMG_6284.JPEGIMG_6286.JPEG


I basically don't throw anything out that still functions, and end up with parts bins like this. A lot of even stock components end up coming in handy later for mocking up stuff or taking measurements off of. I do make it a habit to toss stuff that we've broken just so it doesn't accidentally make its way onto a truck somehow and have us chasing our tails trying to find an issue (like one time I put back on a very slightly bent pin...).
IMG_6285.JPEG


I did find some fancy dancy carbon fiber slipper pads for this spur online, but while we wait I did the slipper pads that have been working well with me so far - automotive grade gasket material, superglued to the spur, then scuffed with 150grit. I scuff the plates with the same grit.
IMG_6293.JPEGIMG_6300.jpeg


I was cleaning out the motor mount adjustment holes and noticed the slightest binding towards the end of the adjustment, turns out the heatsink from the motor fan was hitting the wheelie bar mount. A little clearancing later and it now moves just fine.
IMG_6297.JPEG


While I had it apart and downtime, went ahead and did the MIP rebuild kit that I got. Also did end up installing the 2mm spacer kit between the outer wheel bearings on the knuckle ends as they suggested. Their grease and their blue loctite where they called for it.
IMG_6294.JPEGIMG_6295.JPEGIMG_6296.JPEGIMG_6298.JPEG
 

Latest posts

Members online

No members online now.
Back
Top