95PGTTech 1/10 2WD ECX Ruckus build

With the bigger pin I needed a bigger stop bolt. M4
4E34A679-4605-416E-A0DE-5A55AC471178.jpeg6BECE18A-A64C-4FFC-9067-9C609D111C17.jpeg


Finally had a chance to put the bigger pinions in. Man I love how tight and quiet 48P is! 26T only because the 28T wouldn’t fit with the stock adjustment hole. To be clear, I’m not chasing mph here, we are looking to soften the hit through taller gearing.

C681906C-BA10-414F-8FE8-8BB4D12E5F19.jpeg


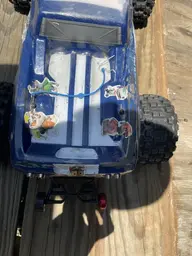
I laid the front shocks down (innermost upper mount, outermost lower) to try and soften the front more, it’s riding around like a vintage gasser. This necessitated moving the receiver, I put it on the servo for now.

DDCA8BFF-56D4-4F2A-9592-ACA6A6A1C4CB.jpeg


Got a fancy new lipo alarm, the old one was taking a dump and is super annoying sounding
8E3C8E95-C0E1-4776-8614-F4BD62E0FAD4.jpeg


Mounted the old GPS box, got smart this time. It’s going to be awhile before the speed demon 4WD is running again

BDD5B54E-2FCF-493F-AC5C-B5A700A5D3C4.jpeg


As better as this wheelie mount has been holding up, it’s back to limited to the two middle positions. Which is fine, they are the only really useful ones. When I finally do the ax10 trans, I’ll redo the bars in steel like I did the 4WD that works so well. That project will have to wait until the other truck is back up consistently

761646AD-F1EB-4023-BB93-BDE568EF19E3.jpeg


34-36 consistently on grass. Still needs a lot of work it doesn’t like to wheelie straight and applying power is an absolute joke. 42mph on pavement with no changes. Shocks and ESC are going to be the moves I can make now without a total tear down
 

Attachments

  • 4268C3AD-E73E-4151-8842-78FABD5E2BC9.jpeg
    4268C3AD-E73E-4151-8842-78FABD5E2BC9.jpeg
    32.7 KB · Views: 2
  • 563E2685-A2F4-4A4C-8726-E541E4F095D9.jpeg
    563E2685-A2F4-4A4C-8726-E541E4F095D9.jpeg
    146.1 KB · Views: 3
  • 28070FF9-22F6-4189-A293-0DAF1510AFE7.jpeg
    28070FF9-22F6-4189-A293-0DAF1510AFE7.jpeg
    229.7 KB · Views: 6
Last edited:
The new (again) wheelie bar setup
1EAF748D-E406-4F58-BF05-58BF0B11F5E3.jpeg


The point I was trying to make about the rear control arms being swept forward. The strut tower to the left is the front of the vehicle. Verified zero toe, all toe comes from the rear hubs
9CAFECFA-4640-4A28-911A-C663AA058BE2.jpeg


M4x0.7x5mm screws are here I can finally ditch these lmao
5FCA289E-5AC1-4603-8317-21D09B6D2DE6.jpeg888FFD3E-C824-439B-A99D-AD045F73A643.jpeg


These pics are from the rear of the 4WD I just rebuilt but the parts are the same XO-1 hubs, slash 5mm hardened steel axles, brass 12mm wheel hexes. Pic of a 5x12x4 bearing next to a stock 5x10x4
00D36839-8450-4B4C-A176-2BB3E9CD5FD5.jpegA9BD8A91-4AAA-462E-87E1-F3B233FD344F.jpeg8DA361D2-A280-4E4C-A7A5-BF7F9DD620C4.jpegB1F4DDCB-175D-4BCB-8E05-67C996695D22.jpeg


Still trying to work around suspension issues, mostly in how it sits at ride height and the hard pull it does after it gets up on the bars. Put the 2wd rear springs on the front (and the red lowers to remind me) with one full preload spacer.
56BFA0F1-001B-4BAB-8A04-7396A56D35B8.jpegD9ABB4EB-A8DD-4C21-A807-0600B0A47BE0.jpeg


Out driving it, it still also grip rolls like a banshee. The grass is super dry and super low so I figured screw it and pulled a preload spacer out of all 4 corners, and it actually seemed to do pretty well over all. I’ll keep playing with it.

As a general basher, it’s finally gotten on point. We put about 5 packs through it this week with moderate jumps, a bunch of balls out speed runs, and generally fooling around the yard chasing dogs and playing fetch. We broke a total of zero parts and had no day-ending failures. Rear arm popped off a time or two and popped right back on. Loctite, the aluminum wheel centers, and the fancy wheel nuts have basically eliminated wheel loosening issues. If I could get it to stop grip rolling or tumbling after a wheelie I could literally sit in a lawn chair and drive it for 15 minutes without getting up.
 
Last edited:
Haven't really done much with it lately other than take it out and run it, the 4WD has been consuming our work time and we finally got smart enough to not take both apart at once. I have some projects for it, but putting them on hold. Broke an axle pin yesterday, luckily it wasn't much more. Went to take apart the other side while I was at it to check on it and the damn grub screw for the wheel hex rounded off so I ended up having to drill and mangle the hex off. Bearings looked all good back there. Threw one of my older hot racing aluminum wheel hexes on for right now. I don't need the weight of the brass back here, so I'm looking for a 8mm wide, 12mm hex with a 5mm axle and uses a grub screw larger than 1.5 which always seem to be a problem. I prefer not to use hexes that don't have their own clamp/grub screw/way to secure.

F2FA4533-75CE-41C9-8D53-834A52FB0452.jpeg01CD62B7-98CA-489E-8B56-4D1C3A804A66.jpeg3682CFFC-6114-4264-BCE8-A6D44AB6E6CF.jpeg

Apparently, "upgraded" axle pins aren't a thing. Everyone says just loosen the slipper. Not happening after that whole debacle. I did have the cover off to check, and everything looks great in there still.
 
Bittersweet day for us. I mentioned we got into RC with this vehicle because I had a bad right lower leg injury that really limited my mobility…we didn’t know at the time it would be over 2 years and 5 surgeries to get back to somewhat normal, and I had a young son and two big dogs that were accustomed to running around like crazy with me outside. My friend bought me this, he was into RC and he thought it would help me keep them moving and dig me out of a bad place mentally (he was right).

My dog (the brindle pit mutt rescue “Dolce”) has had an unspecified metastatic cancer for about the last year (she’s 9, we adopted her at 1). We chose to not do anything aggressive at the time, we knew it was terminal but she seemed in no pain, she was eating, running and acting normally. A couple weeks ago she started losing weight rapidly, lethargic, and this week in obvious pain getting up and down from her spot on the couch. We took her to the vet for basic labs to make sure it wasn’t something easily fixable like an infection or Lymes (big rural wooded property), labs looked fine and vet said it’s time. We brought her home and scheduled it for Monday afternoon so our families could have the weekend to say goodbye.

Today our other dog, Gucci, who recently got off a major surgery and illness and we were guessing wouldn’t be much longer than another year (she’s 11), started acting very odd and my wife noticed a lump on her chest underneath her front leg. My wife came back from the vet and said it’s a rapidly growing metastatic tumor, near her airway, and she has weeks at best. They’ve lived as a pair and been inseparable for 8 years - we made the call to let them die as they had lived - together.

We were blessed with a nice evening to go outside and enjoy playing one last time. Ruckus is much faster than the first time we ran him, the dogs are much older and slower, and my son James has twin brothers now. I even slowed Ruckus down a few times so they could actually catch him once or twice. I’m not exactly sure how much my 3.5yoa kid understands, but I hope he sees these one day and remembers all the fun we had.

F11666F2-10F9-4CA8-AE3B-02464F99CE05.jpeg1416D074-DD69-4662-9524-DEC4E023D15A.jpegCD2BB5ED-2A49-46F7-B42C-17350A4DC3CF.jpegE9FDFA15-3C51-40DC-9D87-9907BECDDF85.jpegDE76223A-B178-499E-9AE2-54A584D60320.jpeg
 
Well poop dude, I am so sorry to hear that. Bad enough loosing one, but two?
I dont have any other words, but, I'm sorry.
 
“When are we going to heaven to see Gucci and Dolce?” I was about his age when my first dog died. My dad says I didn’t understand why we were digging a hole if he was going “up” to heaven. Hopefully I did a good job of explaining it to James.

We took all the dog stuff, the house the inside cage their beds and big bags of food to the shelter we got both of them from yesterday. When he’s older and he asks for one of his own maybe, for now I have plenty of work on my hands with the twins and he still has a “dog.” 2 actually but it seems the 4wd is on the bench more than on the grass.

97ED09D3-50A7-4C0D-B031-6CFC3FA728EC.jpeg
 
Haven’t been doing much to it lately, we run it daily when he and I go out on the property in the afternoon. His brothers get the majority of the attention throughout the day so I try to cut out specific time just for me and him. We have been playing a lot with springs, moving upper and lower shock mounts, and preload spacers.

Two full ones up front and one in back seems to be the best setup as far as transferring power predictably to the rear and getting it to wheelie straight and consistently. The problem is that gives it such a high ride height that you basically need to come to a complete stop to turn it, like driving Gravedigger. We are on grass, so there is no power slide the rear option, it just grip rolls. Being a little vain, it also looks pretty dumb with the front end jacked to the sky like a wannabe gasser. With that much preload, at rest both sets of lower control arms are on a sharp angle downward. If we take a full set out (10mm), it sits a little better, but a lot is lost in rear suspension travel and it starts hitting the wheelie bars hard and doing all sorts of crap.

I’m using 100mm 4wd shock bodies front and rear and I want to keep that amount of suspension travel but I want to get the control arms to a more neutral start point and lower the overall ride height to help it handle better. I have a mile of ground clearance to the grass right now so I’m not worried about killing speed by dragging the chassis through the grass - we ran into that with the much lower 4wd. So, came up with a little experiment…keep the preload, move the upper shock mount further up.

Started out with a piece of 3/8" aluminum scrap I had. I think it was actually part of an old T square I cut apart for a job one time. Rear shock tower was 87mm between the uppermost mounts so drilled a set, then another set 10mm higher than that (and marked for 15mm and 20mm if I needed it). Had to trim out a bit from the middle bottom to clear the middle of the shock tower and the body post mount
BF56D78B-B3B7-48AA-A32D-FDDC839DE91F.jpegD138C6F3-ED32-4794-A65E-721BEC7691FA.jpeg


Definetely not pretty and not optimal as far as the shock body binding against stuff, but good enough for this experiment.
5938C139-4557-4A0A-BBD9-903D65808114.jpeg


This made a dramatic difference in the rear LCA static position, they're actually too far down now for my preference. I'd like them parallel to the ground, midway through their travel, and the shock somewhere in the middle 1/3 of its travel at rest. Drove it quickly with just this rear drop, did not like it. Might have actually decreased total suspension travel because it would just squat and hit the bars, so even though the suspension could articulate a lot more on the bench, on test drive it effectively couldn't.
2E52501B-88BF-4C1F-95A6-4FF8E2997D1A.jpeg


By comparison, the front.
C111A4FC-B45C-471A-96FE-B86991AA2630.jpeg


Same 10mm "drop" as the back, but also offset it 15mm to the outside to get the shock more vertical and effectively add rate (stiffness).
90BBB249-6AAB-4909-9859-3722EC1A0185.jpeg954BFB36-FE4F-4835-A42B-FD8F614A67A3.jpeg


Pretty big difference, but still has the reverse rake. Test drove it, 10mm drop front and rear. Better, for sure than the stock mounting positions without the preload spacers. Suspension worked decently while still keeping it pretty low and allowing it to turn better.
7ED38A2D-14A6-4A6E-ACFE-C299B96483F5.jpeg4EC4A885-2C4D-4E13-93BA-46C2CD5F2A38.jpeg


Took the front back off and drilled 20mm "drop" holes, again with the offset
BBB2B870-5EAF-4E75-9495-A0B5E257CCC7.jpeg
 
Last edited:
20mm drop front, 10mm rear. Test drove, again, minimal improvement, but going the right direction.
A77BA0CC-24E9-4B8E-95DB-C7217DD8909F.jpeg44BD2D45-3FC2-44BD-91C2-A156796166E4.jpeg


Pulled the rear completely out. Back to stock position, 2 preload spacers. Front 20mm drop, 1 preload spacer. Definetely drove the best of all the setups.
176D18F8-7F12-45C2-9377-191C56A447A9.jpeg


You can also see in the last 2 pics I have a different battery in it. I have a 24mm height 3S 100c soft-ish case I was running in the 4wd, so now that he doesn't need it anymore, I figured put it in this one (36mm hard case). How much difference is 12mm of height going to matter? Who knows, but getting weight lower never hurts. Also moved it up about 10mm by grinding away some of the plastic in the area I pictured here in front of the old hard case battery.
2D74D449-F847-4392-95E6-0675CC8973FD.jpeg


I'm going to keep working on the front to get the mount really dialed in and finished to something that can be run long term, but I think overall the experiment was a success. The rear I feel is optimized at this point as a compromise between all the things we are trying to do. I'd be interested to see if sway bars would help this thing, but I'm not keen on needing to run H-R control arms in order to get them fitted.

I have a Max10 SCT, 3650, built ax10 trans waiting to go in this thing and I want to play with some more weight up front when I get that fitted, but I'm going to wait until we get the other one off jack stands before cutting into this one again. Made that mistake already.
 
Last edited:
Took some more pics of the new battery setup

DFA9989B-F73C-4EA9-BD12-1F96D798B267.jpegE226927F-5DFF-4EBD-A1BF-B30CBE2F6075.jpeg


Been meaning to do the left inner wheel bearing for awhile, keep forgetting. Ate this one up pretty good, seems to keep happening more on the left and not really sure why. New axle shaft too, switched up the hex.
346DADD8-FF89-4CA8-993F-AC456EC13F61.jpeg7C6A3281-30AF-4573-B7D5-B6935D02A762.jpeg4CFC5211-1FEB-45AF-80D1-DD6BF77D8B0C.jpeg


Went to put the badlands back on the front (any front weight is good weight), and couldn’t get the front left wheel nut off to save my life. Ended up trying my impact gun and the hex spun in the wheel center. Unbolted the wheel center and cut it off. Prolines for the win again.
C5161DA6-7625-4806-B9AA-1EB67F912A16.jpegE24E2F4D-3F1A-4E94-AA37-C2A1F7AF8D68.jpeg


An idea of how it sits on the grass it runs on
04B8C326-4C3C-467B-818B-EF3312457EB7.jpeg


Version 2.0 of my front shock relocator. 20mm higher with 0, 10, and 20mm offset wider. I ended up settling on the 20/20. Got some actual proper spacers in there to get correct hardware in and get the shocks back at the caster they were before. Seems to work really well, now I need to work on the metal finishing…shaping it to look pretty, and clear the body mounts so I can get the body back on.
862778B7-6DD2-460E-AB93-B1BF97DDE70D.jpeg
8553C662-E64E-4E11-9DB3-D89EF890A769.jpeg


Some quick clips from a few days of goofing off. Never would I have been able to corner like this. The front still retains enough suspension travel that if I hit that jump at full song the chassis doesn’t eat it on the landing. The weight seems to be pretty decent, it flies pretty level if I hit the jump right. Putting the Badlands back on the front (from the Trenchers) increases front grip again so much that it griprolls instead of slides, so I keep going back and forth between the two.

 
Did some metal finishing on the bracket today. In retrospect I could have left the center for the weight, but I think I achieved a look that blends in pretty well. I have that one notch and extra hole on the one side but whatever, it’s the scrap I had on hand. If I redo it down the road, I will probably use at least four bolts to the original shock tower, not just two.

A6C93C15-668E-4017-9F24-2D6A5CBB5175.jpeg7621F361-5878-409E-96A0-1829ECE2B406.jpeg98C28976-459B-463A-9686-06C88F62B170.jpeg


Most importantly to my son, after metal finishing we are now able to get the body back on
8F6DC025-7EF3-4E4D-AB81-F33D0790F84D.jpeg88ECF4E5-83B6-4D7F-A704-BFB0A3FAF57F.jpeg
 
Just wrapping up small things like moving the lipo alarm and gluing spacers in place just to make ease of use/ease of servicing that much easier. I tried to see if I could take out the purple high density foam I had in there behind the battery out and rely on the battery hold down, but I can't, the battery slides back during bashing sessions.
DEA4A76A-3290-4097-83B6-E80E3277988B.jpegAF453D5A-1B7C-498A-A253-EE2EDCB3B6AB.jpeg


James thought Ruckus should join him in playing in his sandbox and thought giant rooster tails were absolutely hilarious. When it was time to clean up, this was how he decided was the easiest way to "help" Ruckus out of the box.
803A6925-5B96-4B03-B285-539EE6855241.jpeg473001F1-505B-4AB3-B0A5-E76CE7186A57.jpeg


We really haven't broken anything in awhile - we pop a rear camber arm off the ball mount every once in awhile on a good tumble. After blowing it off last night, during battery charge and lookover, we noticed a big ouch in the front end - I don't recall a big tumble yesterday or a front end hit. Maybe this was just the accumulation over time, plus all the ballast we have located just behind that? I did some research and swapping to a different 1/10 2WD chassis wasn't really any advantage for what we use this for, so ordered up another. Didn't find anything else wrong, amazingly the grey plastic lower skid plates held everything together well enough despite the chassis fracture.
FA867005-5837-4C49-B0D6-AB3D12934DDD.jpegA8EAA830-895C-4CBA-BF61-C181EEC8EE1F.jpeg01D43272-8B87-490E-964E-6427FBD19B89.jpeg3846B817-FED5-4799-92FF-7BBD96CEDC2C.jpegCE11DEE2-78C8-4A93-8C42-32E8EF7E10F7.jpeg456F70C1-2A8C-4989-8232-0ED21A6FF90B.jpeg
 
Last edited:
Just doing little things while waiting on the new chassis to arrive. Added a tab to the back of the battery hold down so I don't have to run the foam spacer anymore (the dirt accumulator!) I also ended up painting it blue, but it's raining out now and I don't love the thread enough to go walk to the shop and get wet for a picture.
59777B4D-B7EA-48F0-8217-BD006CB0E86F.jpegB5B69FEE-9BB1-4262-9CB5-3224AB067A8C.jpegFF36288C-C2D5-4A6E-9AA5-4B7CFD2726A0.jpeg


James will be very pleased I *finally* got around to putting the LED kit in the front bumper and getting all the wiring cut down to just what is needed. I'll be able to trim a little more down once we get the truck back together. I'd like to be able to figure out a way to chassis-mount lights for the rear too. We used to run body-mount front and rear lights, and while they looked cool, the constant vibration and bashing would just rattle them loose. We ended up gluing the harness to the body to try to keep the lights in place, but time even rattled that loose. Apex makes a tail light kit for a Slash, maybe I'll do something like that.
2E9E0C31-00CC-417D-B38F-028F07D2D3CA.jpeg4478BC61-DADB-4101-BF49-86EFE49EAA1E.jpegAF6E74AE-1D96-461C-B8A6-39C7353D2DA9.jpegAD99A994-6D63-4AFE-98B2-8EA9511C51F9.jpeg


Cut down the mile of wire I had from the steering servo to the receiver. I'm a little particular about my wiring, lol. I was told someone makes a crimper specifically for this style of connector - that would be even cleaner, I have to look into that.
5167E3A4-3822-4D40-A835-077E2AD1DE55.jpegFB725D6D-DE54-43B2-991E-44413093AF77.jpeg


Chassis STILL hasn't even had a tracking number updated by the vendor (despite being ordered 3 business days ago). Ugh, some vendors are better than others. Hopefully it's on its way already and they just forgot to post the tracking info.
 
Last edited:
Just doing little things while waiting on the new chassis to arrive. Added a tab to the back of the battery hold down so I don't have to run the foam spacer anymore (the dirt accumulator!) I also ended up painting it blue, but it's raining out now and I don't love the thread enough to go walk to the shop and get wet for a picture.
View attachment 8541View attachment 8542View attachment 8543


James will be very pleased I *finally* got around to putting the LED kit in the front bumper and getting all the wiring cut down to just what is needed. I'll be able to trim a little more down once we get the truck back together. I'd like to be able to figure out a way to chassis-mount lights for the rear too. We used to run body-mount front and rear lights, and while they looked cool, the constant vibration and bashing would just rattle them loose. We ended up gluing the harness to the body to try to keep the lights in place, but time even rattled that loose. Apex makes a tail light kit for a Slash, maybe I'll do something like that.
View attachment 8544View attachment 8545View attachment 8546View attachment 8549


Cut down the mile of wire I had from the steering servo to the receiver. I'm a little particular about my wiring, lol. I was told someone makes a crimper specifically for this style of connector - that would be even cleaner, I have to look into that.
View attachment 8548View attachment 8547


Chassis STILL hasn't even had a tracking number updated by the vendor (despite being ordered 3 business days ago). Ugh, some vendors are better than others. Hopefully it's on its way already and they just forgot to post the tracking info.

I see this one recommended a lot.
https://www.hansenhobbies.com/products/connectors/tools/crimp_dx/
 
New chassis arrived. Tried to put some 8mm OD washers under the bolts that attach it to the bellcrank (and therefore the skid plates). I wanted to get some on the two that go from the chassis nose to the front lower suspension mount but it's too tight in there. Not that I think it would change much, that's not where it failed.
IMG_5863.JPGIMG_5864.JPGIMG_5865.JPG


Had to make the same clearancing to the battery tray that the old one had, and glue in the extension bolts. I had standoffs in there for the bigger battery, but I can't find anything less than 8mm in m3
IMG_5866.JPGIMG_5867.JPGIMG_5868.JPG


While I had everything apart I took the right rear apart again. Checked the bearings, fine, and changed the hex to match the left side one.
IMG_5869.JPGIMG_5870.JPG


Took this opportunity to install the Max10 SCT esc that just came out of the 4wd. I like it a little better than the 10BL120, easier to program, plus nose weight. In went the Hobbywing 3660 4000kv that came with the combo. I would have liked to stay with either of the 3674s that we have, but the ESC extensions I had on hand wouldn't be long enough for either and we've been without both RCs for a few days now and just wanted to get out and drive. I only have about a 2 hour window in the afternoon to do serious work and concentrate while the babies are asleep. I ordered up longer ones. I have new pine car derby weighs, and pine car weight paste that is going to replace some/all of the wheel weights. Even tightly packed, they don't really utilize all of the available space in the nose.
IMG_5871.JPGIMG_5873.JPG
 
Lights are in. Stuff like this and the Paw Patrol stickers (which I need to find new ones of), are really what my kid loves most about all of this.
IMG_5874.JPGIMG_5875.JPGIMG_5877.JPG


It drove well, but doing the real low speed walk around that we are doing with gears so tall on the 3660 was audibly straining it and we had another ESC getting warm/motor cold situation, so I just let it cool and then we blasted it a bit. At speed, it's fine. I'm going to throw the 3674 back in it when the ESC extensions get here before making any gear changes. I have a 2950kv and a 2250kv, I'll probably go with the 2250kv that was in it and go from there. Little jobs left to do like motor fan, clean up some wiring, alignment but for now she's back to daily basher
 
James was really into driving yesterday afternoon (he's on and off, most days he thinks Ruckus is more like a dog and would rather chase him around the yard and find golf balls with him). Run time was cut down due to hitting the thermal limiter in the ESC. I'm going to play it safe and take him to something low rolling resistance like the park today with the big loose dirt and pavement area until the stuff gets here to change to the 3674

Might have a little *too much* weight on the front at this point, there is a little rake even while under moderate power. Good problem to have. Wheelies really only happen at this point unless you're hammering the throttle. They're predictable and they don't come up violently on the bars anymore (unloading the rear suspension and causing it to tumble). We're getting there with this thing.
image4.jpegimage5.jpeg
 
I love wheelies for the most part, but they can be a bit annoying when your just trying to do a fast run.
I guess I could just take my finger out of it a bit more........ppppppppfffffffttttttttttttt who am I kidding .... 🤣
 
ESC extension cables on big delay - While we were at the park today, I unpacked the 2WD too and we made a couple hits - interestingly, keeping the throttle hammered seems to keep the ESC and the motor in a more ideal working range and they get barely more than warm to the touch - in 85F ambient.


Its relatively easy to drive, though I am ramping into the throttle *very* slowly with the amount of space we have to work with here. It is cutting out from current draw at the top of each pass. Getting the correct motor back in there and the gearing optimized may help that, but not really something I'm looking to chase - this is our daily driver, so to speak. Still, I was really surprised at the number when we saw it. It took a couple good tumbles throughout the day and broke nothing which is really the primary objective as James starts to drive it more. His uncle (my younger brother) Jonathan was with us today. James still thinks he has a chance of a footrace with Ruckus - bless his heart.

483946F6-FF9D-464A-A20F-BA30BB1BD2D9.jpegBD46CF1C-4D6A-467C-AD87-7CB888CE8AC0.png


We ran it once quick on pavement and it did 43mph, but I couldn't keep the front end down on the big end and we had less room to use than the grass fields.
 

Latest posts

Members online

No members online now.
Back
Top