RPM Servo-Saver Eliminator Install/ Review on Amp MT

I replaced my servo with a Power HD 1501MG today and the steering performance was a lot better. I did notice however, that the screw which holds the front end of the steering arm to the "collarbone" (no idea what it's called, the thing which has the inside ball studs for the turnbuckles on it) had tightened itself somehow, which caused the servo saver to open a bit all the time (even when recentering for example, giving untrimmable results).

I superglued my caster block shoulder screws after losing two and they hold out fine. I tightened them all the way (not hard though, as I feel they'll just burrow plastic out of the blocks) and the shoulders are long enough to prevent it from sticking. I think these are the screws some of you were saying cause stiction when too tight? I must have different screws, they're from the replacement shoulder screw set (ECX1065).
 
I installed the servo saver eliminator today. It was awesome for five minutes. I have a little lap around the inflatable swimming pool I had been running this afternoon, it's like a 7 second figure eight track. With the rpm servo saver eliminator it was a 5.5 second lap. Phenomenal difference. The car was actually oversteery on the grass now.

Then I hit the pool and the servo horn skipped a few teeth. After that I could just move it over a tooth by pushing the wheels, so it is stripped out. So it essentially broke the car, like yours did.

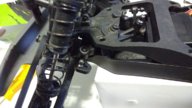
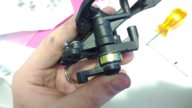
I did find out something peculiar. The issue I had with the stock linkage hitting the servo horn, limiting right steering lock, is gone with the shallower rpm arm. However there is a different problem slightly reducing right lock. The other side (the front part of the arm) hits the side of the chassis. The stock arm has a cutout profile on this part to clear the chassis, the rpm part is beefier but without the cutout. See the pictures below. It is minor issue, it steers just fine either direction without the servo saver constantly opening.

IMG_20160610_210636604.jpg
See the two parts placed on top of each other. Top part is rpm, without cutout at the bottom left of the arm.
IMG_20160610_210744467.jpg
 
Looks like you have a metal-geared servo? With no servo saver, the plastic servo arm becomes the sacrificial part. I know many racers here that do not run a servo saver and use a metal servo arm for the uulllllltimate steering precision, but they're also quite good drivers. Me? I use DU-BRO's plastic servo arms and keep several ready in my parts box.
 
Indeed the servo is metal geared. I will try to find a long enough metal arm, because I'm pretty sure the ball cups will pop off when I hit something instead of breakage.
 
Just to throw this out there; it may not apply to your situation, bit I found out the hard way that the servo horn that came on the truck does not fit most metal gear servos.

For example, when I purchased my new servo I striped the death the same day. I can to realize I needed to put on the 25t servo horn. (multiple horns come with the truck) once I put on a 25t horn I never striped it again. I did however upgrade to a aluminum on as the horn was bending out word when I would turn the wheels to the left.
 
I have one of these Dynamite aluminum servo arms that's a match for the stock plastic arm: http://www.horizonhobby.com/1-2-machined-aluminum-servo-arm:-fut-black-dyn2531

Thanks I will try to find that one on eBay. With regard to the post below, what type is the spline if you happen to know?

Just to throw this out there; it may not apply to your situation, bit I found out the hard way that the servo horn that came on the truck does not fit most metal gear servos.

Omg you're right they have numbers on them and I need to use the 25 teeth according to the 1501mg data sheet. I guess you can say I f***ed that one up!
 
Thanks I will try to find that one on eBay. With regard to the post below, what type is the spline if you happen to know?


Omg you're right they have numbers on them and I need to use the 25 teeth according to the 1501mg data sheet. I guess you can say I f***ed that one up!
I am glad you were able to figure it out. I am sure many people make the same mistake.

Also, looking back on my past post I hate typing on my phone. Too many typos, but I'm sure you know what I was trying to say.
 
Many have posted about the RPM Servo-Saver Eliminator. I figured I'd do a more in depth look at the kit and install. RPM part# 73492 is the kit used for this install. It is done on an Amp MT, but the kit also fits the Boost, Ruckus, Circuit and Torment.

RPM Servo-Saver Eliminator Bellcrank

How to install the RPM Servo-Saver Eliminator Bellcrank in ECX AMP


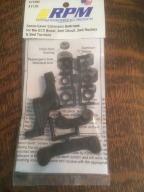
The packaging:

IMG_0426.jpg

I got this kit to alleviate vague steering as well as a large wobble when going in reverse.

th_start.jpg

Here is the complete kit:

View attachment 640

To uninstall the ECX unit start by removing 6 screws. The below photo shows them, they hold the cover plate down.

IMG_0427.jpg

Next pop off the ball links on the servo arm and the two on the steering links.

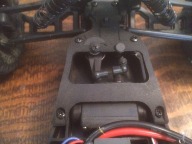
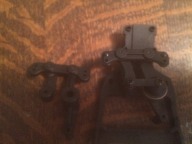
Here is what the underside of that plate looks like. As well as the assembled RPM unit on the left. Two screws removed with the with the link between the two pivot points and the ECX unit comes out.

IMG_0429.jpg

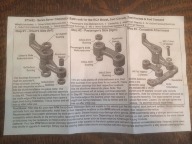
Next is the assembly of the RPM unit. Their directions are below.

IMG_0428.jpg

Transfer over the ball studs, there are 3. A 7/32 socket is used for this.

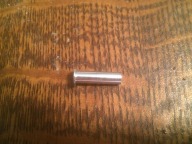
You also need to transfer over this bushing:

IMG_0430.jpg

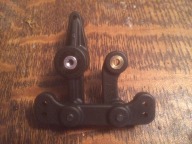
One of my gripes about this kit is the plastic bushings. Lucky for us, the ECX unit has two metal bushings that are the exact same size as the RPM plastic bushings. So I promptly swapped those over. The two metal bushings are in the arm on the right.

IMG_0431.jpg

Now the RPM unit is mounted to the steering cover plate using the 2 screws and link you removed earlier. Don't forget the washers under each pivot point between the plate and servo saver eliminator.

Reinstall the plate in the chassis and hook up the 3 ball links.

Thoughts about the RPM Steering Bellcrank


1. I don't care for the use of plastic bushings that we have to first deburr thanks to the parts tree removal. I will be going to bearings next but wanted to do a apples to apples comparison on this mod alone. The same goes for why I did not do a servo upgrade yet.

2. The RPM kit is quite smooth, but I believe the ECX setup was a little better. If tightened completely the RPM kit binds some. So some care is needed during install.

3. Performance wise, the steering is a bit sharper and I don't notice as much wobble. But.....

th_end.jpg

It's still there......
Where do get the metal bushings? And this will fit my 2wd ruckus MT 1/10scale?
 
Where do get the metal bushings? And this will fit my 2wd ruckus MT 1/10scale?

If you are speaking of the ones I referenced in my install, they come stock in the ECX setup. I simply transferred them over to the RPM unit. Yes, it will fit any 1/10 scale ECX 2wd chassis.
 
I'd suggest using the Delrin bushings supplied with the RPM kit. Far less friction than metal bushings and they won't cause as much wear. If you want the Supreme-Ultimate setup buy bearings from AVIDrc.com. RPM lists the appropriate sizes in the instruction sheet. Although I think cartridge bearings provide a tiny performance benefit over the Delrin bushings.
 
Honestly I don't think friction is an issue in this application. As soon as the truck is rolling, the tires will put up WAY more resistance than the bushings. Wear is the only parameter here.
 
Just to throw this out there; it may not apply to your situation, bit I found out the hard way that the servo horn that came on the truck does not fit most metal gear servos.

For example, when I purchased my new servo I striped the death the same day. I can to realize I needed to put on the 25t servo horn. (multiple horns come with the truck) once I put on a 25t horn I never striped it again. I did however upgrade to a aluminum on as the horn was bending out word when I would turn the wheels to the left.

Omg you're right they have numbers on them and I need to use the 25 teeth according to the 1501mg data sheet. I guess you can say I f***ed that one up!

Am I reading this right that the problem @xlDooM had with the servo saver eliminator skipping teeth on the servo was just because the horn that was fitted wasn't right? So with the correct 25 tooth horn the servo saver will continue to make the huge improvements he (or she?) initially saw from installing it?
 
Correct: once I put the correctly splined servo horn on it, mine never skipped again and it steers fantastic now (if the front wheels are in contact with the ground that is...).

However, this is for the 1501MG servo + RPM servo saver eliminator. If you run the RPM part on the stock servo, it is quite likely that your servo will strip its plastic internal gears when you hit something wheel-first, like many people in this thread have attested!

The stock servo is very weak anyway, if I had a build-to-drive kit I wouldn't even bother ever bolting it in there, immediately buy a stronger metal geared one.
 
Cool, will probably be fine for now as it's only going to be stock for a good while, my little boy won't need more than that for a while.

I shall bare it in mind though for future reference (or if I get really enjoy is and get myself one too... :)
 
For any UK peeps that are interested I have just emailed RC bearings (http://www.rcbearings.co.uk) to ask if they would add a kit for the RPM Servo Saver Eliminator to make life nice and simple for purchasing the right bearings.

I'll update with a link when I hear back from them, which on past experience will hopefully be very soon.

UPDATE: here is the link to the kit, a mere £3.60 for the 6 bearings needed. :)

http://www.rcbearings.co.uk/index.php?route=product/product&product_id=1706&search=ecx
 
Last edited:
So, I can now confirm that when you run the servo saver eliminator and a metal geared servo, the stock servo horn is indeed the sacrificial part...

tPrn4sK.jpg
 
What has everyone done with the linkage between the steering horn and RPM saver? No aftermarket?
There has to be something, OEM linkage attached, just does not align straight or parallel to the ground per say, it has a slight angle.
I am going to see if I can do a modification possibly between the two pieces (horn and saver).
Just seeing what everyone else has done.
 

Latest posts

Members online

No members online now.
Back
Top